This post may contain affiliate links. Please read our disclosure policy.
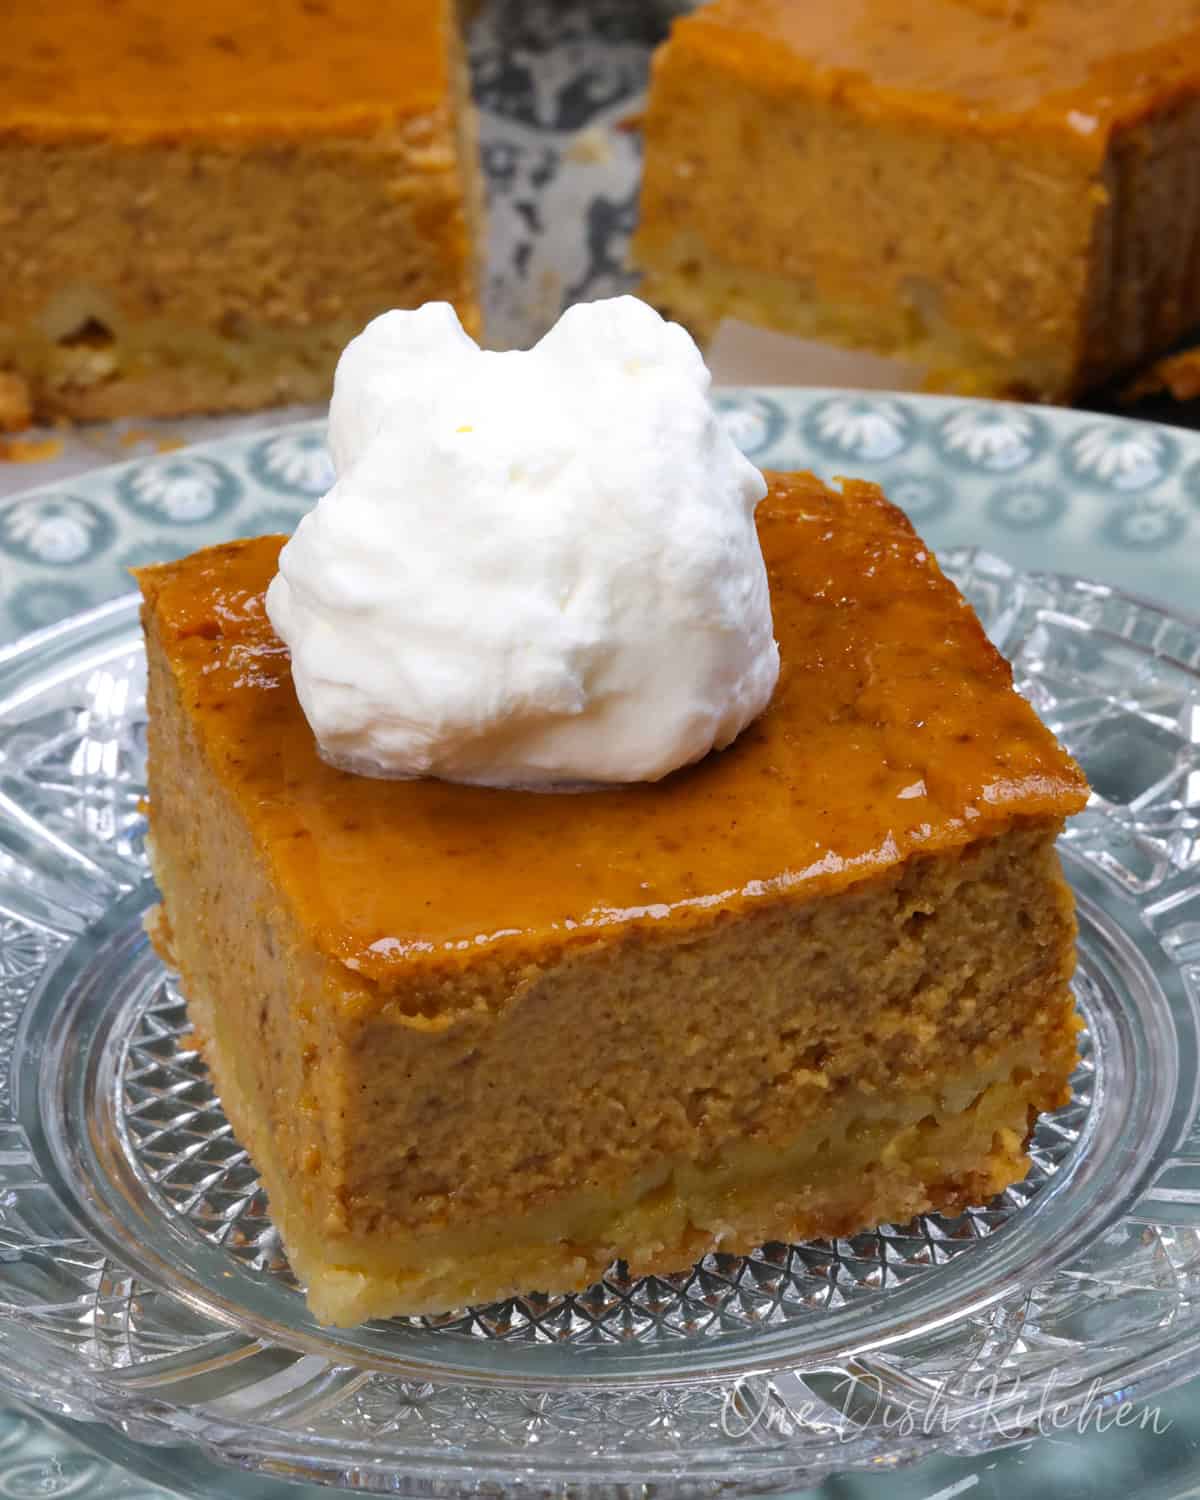
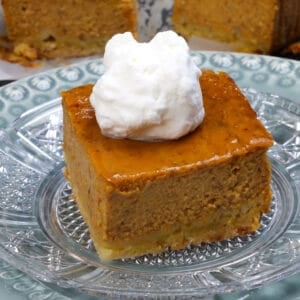
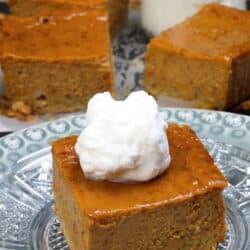
These small batch pumpkin pie bars are made with a buttery shortbread crust and a thick, creamy pumpkin filling spiced with warm fall flavors. Baked in a small dish, they’re an easy and delicious way to enjoy the taste of classic pumpkin pie in bar form.
Featured Comment
“Made these bars for Thanksgiving for just my husband and I and they were AWESOME!!!!
– Kim
In my opinion better then pie!”
Why You’ll Love This Recipe
- Classic Pumpkin Pie Flavor: All the flavor of classic pumpkin pie – with a rich, spiced filling and an easy shortbread crust.
- Real Pumpkin Goodness: Pure pumpkin purée paired with cinnamon, ginger, and cloves for that authentic taste.
- Easy, No‑Stress Baking: Simple steps, no tricky crust folding, just press, pour, bake.
- Make-Ahead Friendly: Keeps well, so you can bake it in advance.
- Versatile Size: Ideal when you want a smaller dessert for one or two people.
These pumpkin pie bars are one of my favorite fall desserts to bake. The shortbread crust is buttery and crisp, and it comes together so much faster than a traditional pie dough.
The filling is thick, creamy, and full of warm spices, just like a classic pumpkin pie. I love that this recipe feels festive but doesn’t require a lot of time or ingredients. It’s an easy way to enjoy all the flavors of pumpkin pie in a smaller, more manageable size.
They’re a great option when you’re preparing a small Thanksgiving celebration but still want something that feels festive and special.

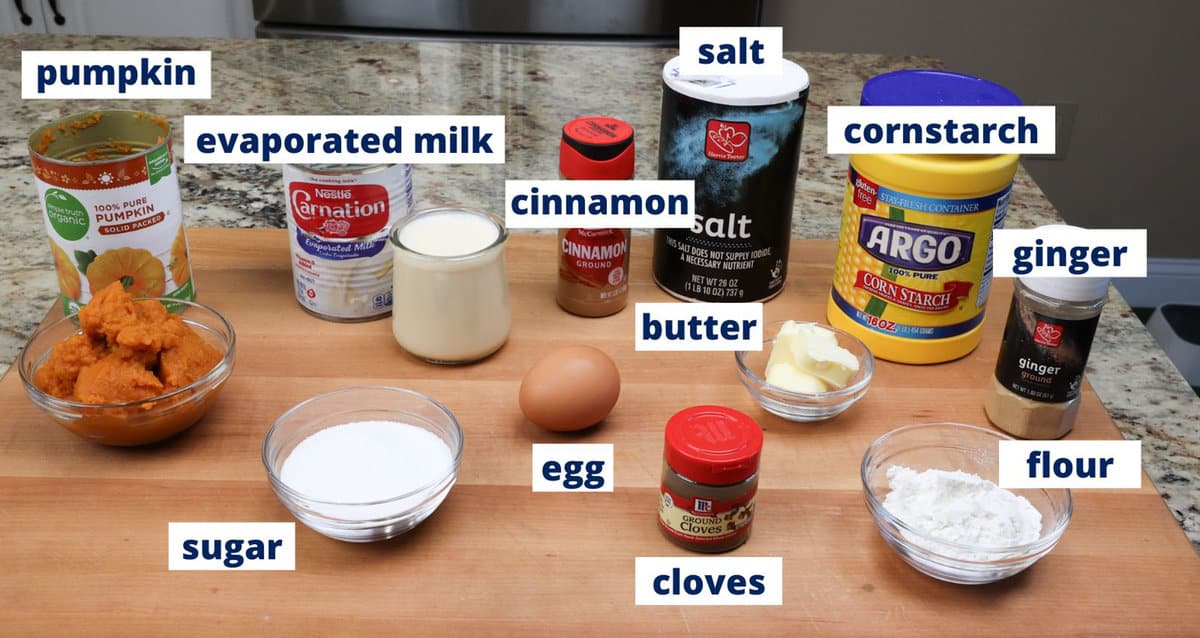
Ingredients
If you have any ingredients leftover from this small batch pumpkin pie bars recipe, check out our Leftover Ingredients Recipe Finder.
- Butter: Use regular or vegan butter for a dairy-free crust.
- Cornstarch: Helps create a tender, crumbly crust.
- Pumpkin Purée: Use pure canned pumpkin, not pumpkin pie filling. Use leftover pumpkin in small batch pumpkin granola, small batch pumpkin muffins, mini pumpkin dump cake, or single serving pumpkin soup.
How To Store Leftover Pumpkin Purée
- Refrigerate: Store in an airtight container for 5 to 7 days. Label with the date.
- Freeze: Portion into zip-top bags or containers, label, and freeze for up to 3 months.
- Ice Cube Tray Tip: Freeze 1-tablespoon portions in an ice cube tray, then transfer to a zip-top bag. Great for smoothies or small recipes.
- Spices: A mix of cinnamon, ginger, and cloves gives the bars their classic flavor. You can use 1 teaspoon of pumpkin pie spice instead.
- Evaporated Milk: Makes the filling creamy. Canned coconut milk is a good dairy-free option.
See recipe card below for a full list of ingredients and measurements.
Recipe Variations
Try one of these simple ways to change up the flavor or make the recipe fit your needs:
- Gluten-Free Crust: Use a 1:1 gluten-free flour blend in place of all-purpose flour.
- Dairy-Free Option: Swap evaporated milk with canned coconut milk and use plant-based butter in the crust.
- Chai-Spiced Filling: Add cardamom, a pinch of black pepper, extra cinnamon, and a dash of nutmeg for a warm chai flavor.
- Chocolate Chip Pumpkin Bars: Sprinkle mini chocolate chips over the crust before adding the filling.
How To Make Pumpkin Pie Bars
These photos and instructions help you visualize how to make a small batch of pumpkin pie bars with shortbread crust. See the recipe cardbelow for ingredient amounts and full recipe instructions.
Prepare the Crust
- Lightly butter a 5×5-inch baking dish. Line it with parchment paper, then lightly butter the parchment.
- In a medium bowl, use an electric mixer to beat the butter and sugar until smooth. Add flour, cornstarch, and salt. Mix until a dough forms.
- Press the dough evenly into the prepared dish using your fingers or the back of a spoon.
- Bake at 350°F for 15–18 minutes, until lightly golden. Set aside to cool.

Make the Filling
- In a small bowl, mix together the sugar, cinnamon, salt, ginger, and cloves.
- In a separate bowl, beat the egg, pumpkin purée, and spice mixture with an electric mixer until smooth.
- Slowly add evaporated milk and mix until fully combined. Pour the filling over the cooled crust.
- Place the baking dish on a rimmed sheet pan. Bake at 350°F for 55–60 minutes, until the center is set with a slight jiggle.

Cool and Slice
- Let the bars cool in the dish on a wire rack for 2 hours.
- Lift the bars out using the parchment paper and place on a cutting board.
- Peel back the parchment and slice into squares.

Enjoy with homemade whipped cream, if desired.
Expert Tips
- Read the Recipe First: Review the full recipe, ingredient notes, and any process photos before starting.
- Use the Right Baking Dish: A 5×5-inch baking dish or 4×6-inch dish gives the best crust-to-filling ratio.
- Line with Parchment: Leave a bit of overhang to easily lift the bars out after baking.
- Adjust Spices to Taste: Add more or less spice depending on your preference.
- Cool Completely: Let the bars cool fully before slicing to help them set properly.
Frequently Asked Questions
A 5×5-inch baking dish or 4×6-inch baking dish works best for this recipe to ensure the right crust-to-filling ratio.
Yes, just make sure it’s cooked, well-puréed and similar in texture to canned pumpkin. Avoid using watery or stringy purée.
Store them in an airtight container in the refrigerator for up to 5 days.
Yes, once cooled, wrap the bars tightly and freeze for up to 2 months. Thaw in the refrigerator before serving.
Yes, double the ingredients and bake in two 5×5-inch dishes or one 6×8-inch dish.
Ways To Use Leftover Ingredients
If you have any ingredients leftover from this recipe, check out our Leftover Ingredients Recipe Finder or you might like to consider using them in any of these single serving and small batch recipes:


If you’ve made this easy pumpkin pie bars recipe, I’d love to hear how it turned out for you. Please rate the recipe and share your thoughts in the comments below.
Snapped a photo? Tag us on Instagram; we’d be thrilled to see your creation!
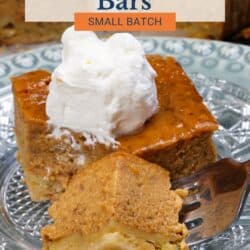
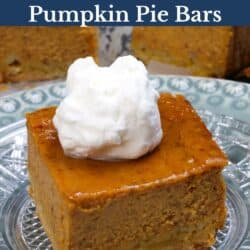
Small Batch Pumpkin Pie Bars
Equipment
Ingredients
For the Crust
- 2 ½ tablespoons butter -plus more for greasing the baking dish.
- 2 tablespoons granulated sugar
- ¼ cup all-purpose flour
- 1 tablespoon cornstarch
- ⅛ teaspoon salt
For the Filling
- 6 tablespoons granulated sugar
- ½ teaspoon ground cinnamon
- ¼ teaspoon salt
- ¼ teaspoon ground ginger
- ⅛ teaspoon ground cloves
- 1 large egg
- 7.5 ounces pure pumpkin puree (half of a 15-ounce can of pure pumpkin)
- 6 ounces evaporated milk (half of a 12-ounce can of evaporated milk)
- Optional for topping: whipped cream
Instructions
- Preheat the oven to 350° F (177° C).
Make the Crust
- Lightly butter a 5×5-inch baking dish. Line it with parchment paper, then lightly butter the parchment.
- In a medium bowl, use an electric mixer to beat the butter and sugar until smooth.
- Add flour, cornstarch, and salt. Mix until a dough forms.
- Press the dough evenly into the prepared dish using your fingers or the back of a spoon.
- Bake for 15-18 minutes, until lightly golden. Set aside to cool.
Make the Filling
- In a small bowl, mix together the sugar, cinnamon, salt, ginger, and cloves.
- In a separate bowl, beat the egg, pumpkin purée, and spice mixture with an electric mixer until smooth.
- Slowly add evaporated milk and mix until fully combined.
- Pour the filling over the cooled crust. Place the baking dish on a rimmed sheet pan.
- Bake at 350°F for 55–60 minutes, until the center is set with a slight jiggle.
Cool and Slice
- Let the bars cool in the dish on a wire rack for 2 hours.
- Lift the bars out using the parchment paper and place on a cutting board.
- Peel back the parchment and slice into squares.
Notes
- Read the Recipe First: Review the full recipe, ingredient notes, and any process photos before starting.
- Use the Right Baking Dish: A 5×5-inch baking dish or 4×6-inch dish gives the best crust-to-filling ratio.
- Line with Parchment: Leave a bit of overhang to easily lift the bars out after baking.
- Adjust Spices to Taste: Add more or less spice depending on your preference.
- Cool Completely: Let the bars cool fully before slicing to help them set properly.
Nutrition
The information shown is an estimate provided by an online nutrition calculator. It should not be considered a substitute for a professional nutritionist’s advice.


Made these bars for Thanksgiving just my husband and i and they were AWESOME!!!!
In my opinion better then pie!
Thank you!
Hi Joanie! Would I be able to substitute evaporated milk with whipping/heavy cream (33% M.F.)?
Thank you!
Hi! You can definitely use heavy cream as a substitute for evaporated milk, and it should work just fine. The only thing to keep in mind is that heavy cream has a higher fat content, so it will make the bars a bit richer and thicker. While I haven’t tested it myself, you might want to consider using a combination of heavy cream and milk to balance it out. That way, you can still achieve the right texture without it being too rich. Let me know how it turns out if you give it a try!
Can you freeze the unused pumpkin puree for later use?
Yes: Storing Leftover Pumpkin Purée in the Fridge: An opened can of pumpkin purée will last between 5 to 7 days when stored in the refrigerator. For best results, transfer the leftover purée to an airtight container and mark it with the opening date.
Freezing Pumpkin Purée: For longer storage, you can freeze the purée. Place the portion sizes you’ll use most often in zip-top bags, label with the date, and freeze away.
Ice Cube Tray Hack: For more precise portioning, spoon 1 tablespoon of purée into each section of an ice cube tray and freeze. Once solid, pop the cubes into a zip-top bag. They’re perfect for dropping into smoothies or thawing for recipes.
Freezer Shelf-Life: Frozen pumpkin purée will keep its quality for up to 3 months.
This was Delicious!! Thank you for sharing the recipe! 👏🏻Yesterday I had Thanksgiving in August and made this😄😋 the one of two substitutions I did was I didn’t have evaporated milk, so I used my 1% milk (
12 ounces, because I doubled the recipe) and added one tablespoon of cornstarch to it. I couldn’t tell any difference at all! 😋
The second substitution that I made, I made my own pie crust and not the shortbread crust.
Sounds wonderful! I’m so happy you enjoyed the bars.
My husband and I loved this. I think I should have cooked the crust a little longer and I did end up baking the filling for 65 minutes to get it to set up appropriately. We ate two of the bars that day at room temperature and the two remaining bars refrigerated the next day. Both of us preferred it cold. Delicious! Thank you for another great recipe.
I’m so happy you both enjoyed the pumpkin bars. Thank you so much for your feedback!
You offer an option to increase recipe size. You alter ingredients, but, then, do not give a subsequent new pan size and baking time.
We’ve included the information about dish sizes for doubled recipes in the Frequently Asked Questions (FAQ) section of the blog post for your convenience. Now, to make it even more accessible, we’ve also updated the recipe box at the bottom of the page. If you’re making a larger batch of pumpkin pie bars, just double the ingredients mentioned in the recipe box. Choose from either two 5×5-inch dishes or one similar in total area (40 to 50 square inches), like a 6.5×6.5-inch or a 6×8-inch dish. Remember, the baking time might vary slightly depending on the size of the dish, so it’s best to monitor your bars as they bake.
If I double the recipe, what size pan would I use?
If you’d like to make a larger batch, simply double the ingredient amounts and use either two 5×5 inch baking dishes or use one 6×8 inch baking dish or one 6.5×6.5 inch baking dish.
Can these pumpkin bars be frozen?
I have some leftover puree from another
recipie but enough for this one!
I haven’t actually frozen these bars since this is a small batch recipe and they usually get devoured pretty quickly. However, I’ve had success freezing slices of pumpkin pie. I wrap them in a double layer of plastic wrap, followed by a layer of aluminum foil. They’ve stayed tasty for up to a month this way. So, while I can’t speak for these bars specifically, you could try a similar method if you’re looking to extend their life.
Do you spread the crust up the sides of the dish, like a pie or just on the bottom?
For these pumpkin pie bars, the crust is only pressed into the bottom of the baking dish. You don’t need to spread it up the sides like you would for a traditional pie. If you check out the process photos within the recipe post, you’ll see exactly how it’s done. Hope that clears things up.
Terrific recipe.
Thank you.