This post may contain affiliate links. Please read our disclosure policy.
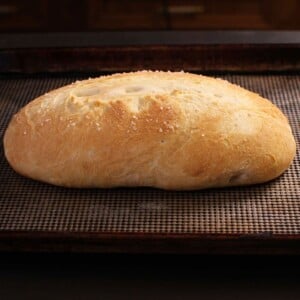
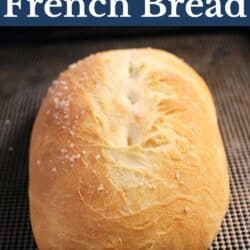
This small loaf French bread recipe makes one single loaf with a golden crust and soft, airy center. It’s an easy homemade bread that’s the perfect size for one or two people.

Featured Comment
“This recipe was easy and the bread turned out light and delicious. The exact right amount for 1 or 2 people. I will be keeping this one and making the bread often.”
– Starla
Quick Look
- Prep Time: 2 hours 40 minutes (includes two rises)
- Bake Time: 18 to 20 minutes
- Total Time: About 3 hours
- Equipment: Stand mixer or by hand
- Cook Method: Bake at 400°F (200°C)
- Servings: 12 slices
- Difficulty: Moderate. This recipe uses yeast, so water temperature and rise times matter. Step-by-step photos are included for every stage.
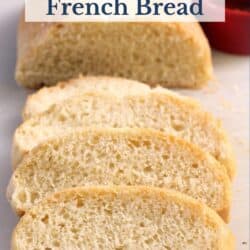
This small loaf French bread has a golden, crispy crust with a soft, chewy center that pulls apart easily. An easy bread recipe for one person or a small household.
Why I Love This Small Loaf French Bread

I started baking French bread years ago, and I got pretty good at it. But every recipe I found made two full loaves. For one person, that’s a lot of bread sitting on the counter going stale.
So I figured out how to scale it down. It took 2 days of testing to get the ratios right. With less dough, the balance between yeast, flour, and water matters more. Too much of one thing and the bread won’t rise or the crust stays pale. I kept adjusting until I got it right. Now this single loaf of bread bakes up with a golden, crispy crust and a soft, airy center.
One small loaf. Just enough to slice warm from the oven, spread with butter, and actually finish before it dries out.
I included step-by-step photos so you can see what the dough should look like at every stage.
This small loaf French bread is great with a bowl of French onion soup, a single serving of chili, or just torn apart with some homemade jam.
Watch How To Make A Small Loaf Of French Bread

Table of Contents
- Quick Look
- Why I Love This Small Loaf French Bread
- Watch How To Make A Small Loaf Of French Bread
- Ingredient Notes
- Bread Dough Variations
- How To Make A Small Loaf Of French Bread
- Expert Tips
- Troubleshooting
- Serving Suggestions
- Frequently Asked Questions
- Ways To Use Leftover Ingredients
- Small Loaf French Bread Recipe
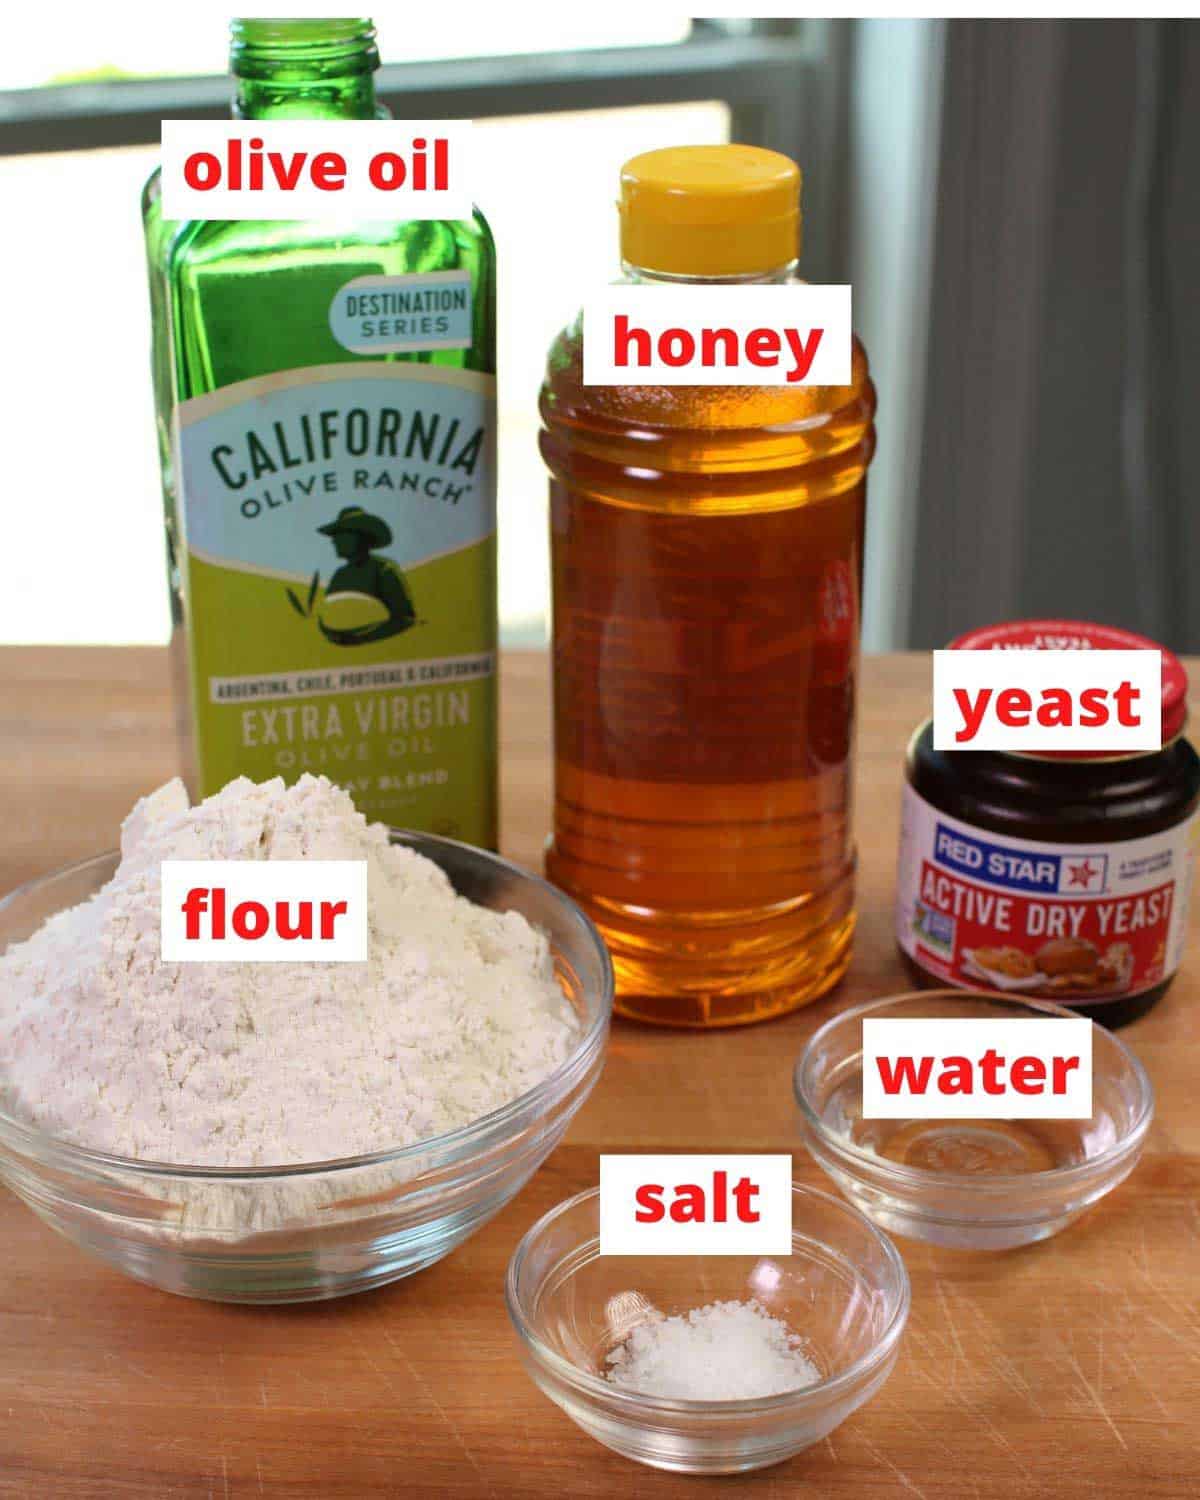
Ingredient Notes
If you have leftover ingredients from this small bread recipe with yeast, check out our Leftover Ingredients Recipe Finder.
Flour: All-purpose flour or bread flour both work in this French bread recipe. All-purpose gives you a softer loaf. Bread flour has more protein, so you’ll get more chew and a better rise, but the dough will feel firmer since it absorbs more water.
Water: Use warm water between 90–100°F to activate the yeast. Water that’s too hot will kill the yeast, and water that’s too cold won’t activate it. If you don’t have a thermometer, it should feel warm on your wrist but not hot.
Salt: Salt adds flavor and keeps the yeast in check. Without it, the dough rises too fast and the bread tastes flat. You’ll also sprinkle a little on top before baking.
Active Dry Yeast: Active dry yeast needs to dissolve in warm water before you mix it with everything else. If you have instant yeast, use the same amount and add it straight to the dry ingredients.
Honey: A tablespoon of honey feeds the yeast and helps the crust brown in the oven.
Olive Oil: Extra virgin olive oil adds richness and keeps the bread tender. You’ll brush more on top before baking for a golden crust. Vegetable oil works as a substitute.
Bread Dough Variations
This small loaf French bread dough works well as a base for other flavors. Here are a few worth trying:
Olive and Walnut Bread: Fold in 1/8 cup of chopped kalamata olives and 1/8 cup of chopped walnuts when mixing the dough. The olives add a salty, tangy bite and the walnuts give it some crunch. After baking, brush the top with melted butter mixed with 1/4 teaspoon of garlic salt.
Rosemary and Roasted Garlic Bread: Add 3–4 roasted garlic cloves and 1/2 tablespoon of chopped fresh rosemary just before shaping for the second rise. To roast garlic, cut the top off a whole head, drizzle with a tablespoon of olive oil, wrap in foil, and roast at 400°F for 30–35 minutes until soft and golden.
Cheese Bread: Mix in 1/4 cup of shredded Parmesan, Gruyère, or sharp cheddar during the first knead. You’ll get little pockets of melted cheese all through the bread.
Herb Bread: Add 1 tablespoon of chopped fresh herbs like thyme, basil, or oregano to the dough. Dried herbs work too. Use about 1 teaspoon if going that route.
How To Make A Small Loaf Of French Bread
These photos walk you through each step of the process. For ingredient amounts and the full recipe, see the recipe card below.
- Mix the Dough
In a large bowl, add the flour, salt, honey, olive oil, and warm water. Sprinkle the yeast over the water and let it dissolve. Mix with a stand mixer or by hand. If using a stand mixer, start with the paddle attachment until the dough comes together.
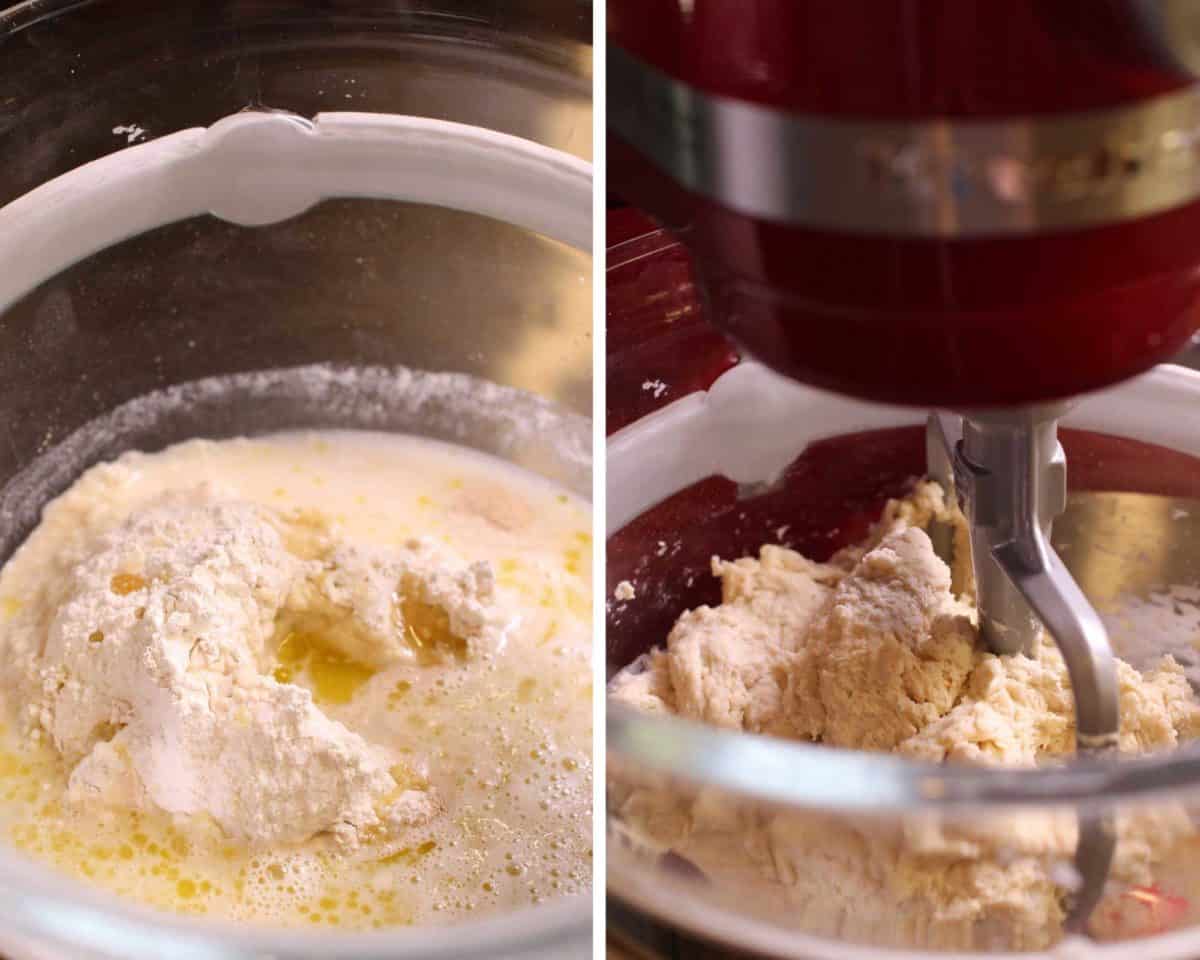
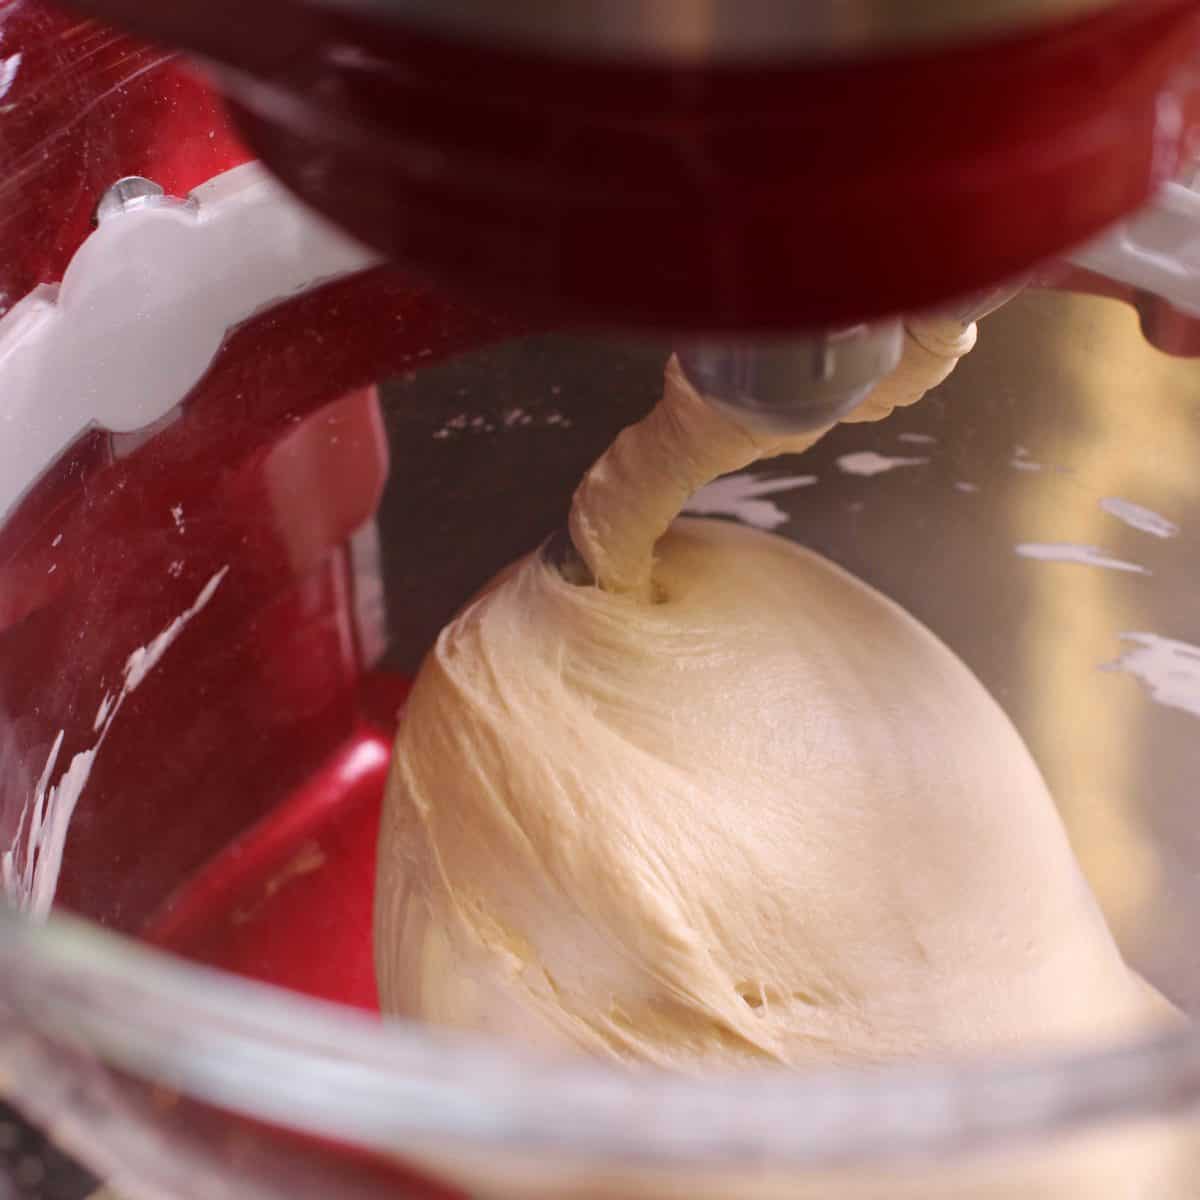
- Knead the Dough
Switch to the dough hook and knead for about 10 minutes. The dough should be smooth and elastic. To check, pull off a small piece and stretch it thin. If you can see light through it without it tearing, it’s ready. If it rips, knead a few more minutes.
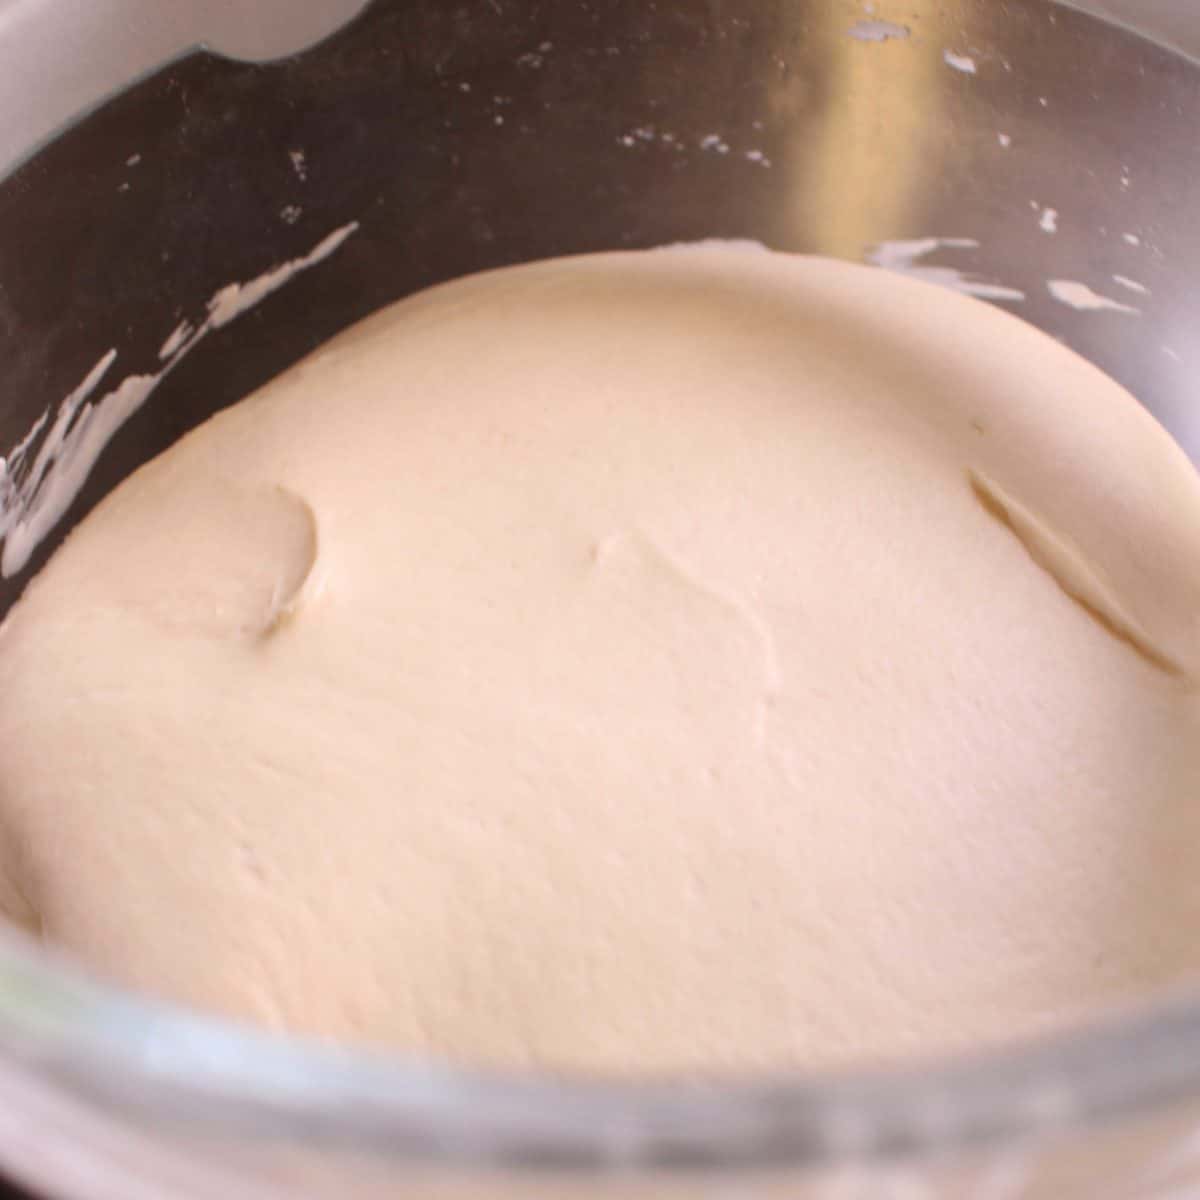
- First Rise
Cover the bowl with plastic wrap and let the dough rise until it doubles in size, about 1 hour. Press a finger lightly into the dough. If the indent stays, it’s ready. If it springs back, give it more time.
- Rest the Dough
Turn the dough onto a lightly floured surface and knead it gently a few times to push out the air. Cover with a dish towel and let it rest for 10–15 minutes.
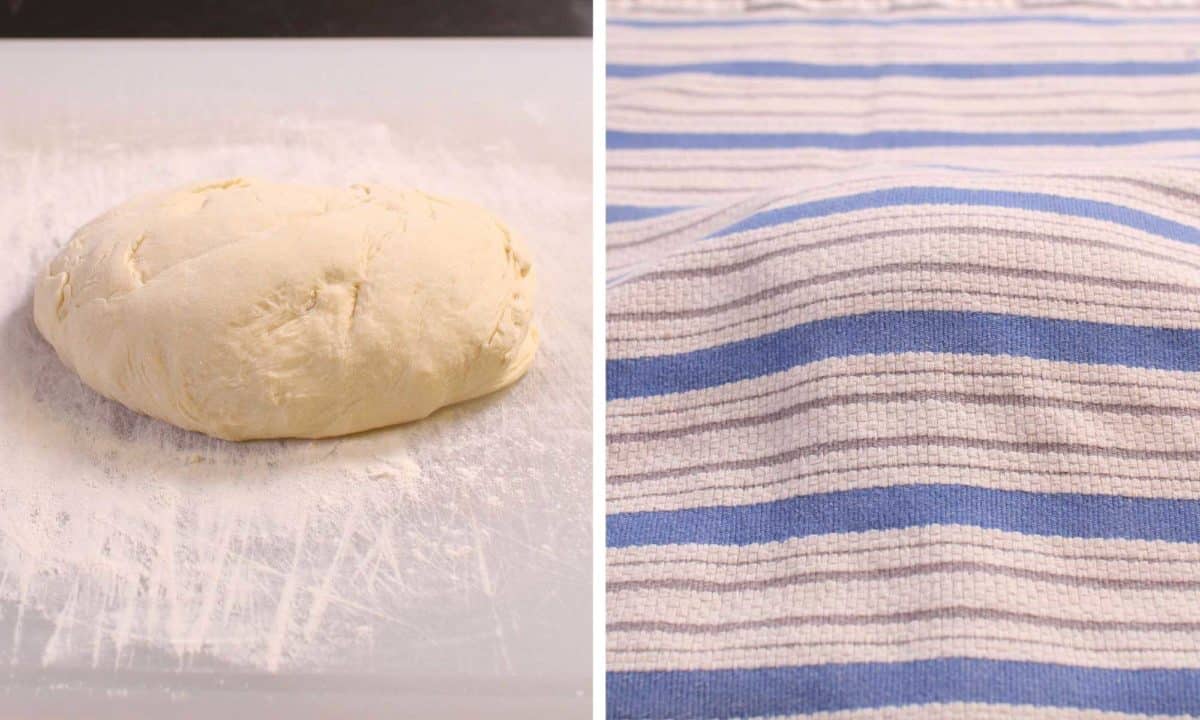
- Shape and Second Rise
Shape the dough into a round boule, an oval, or a 6×3-inch rectangle for a baguette. Place it on a baking sheet, cover with a dish towel, and let it rise for about 1 hour.
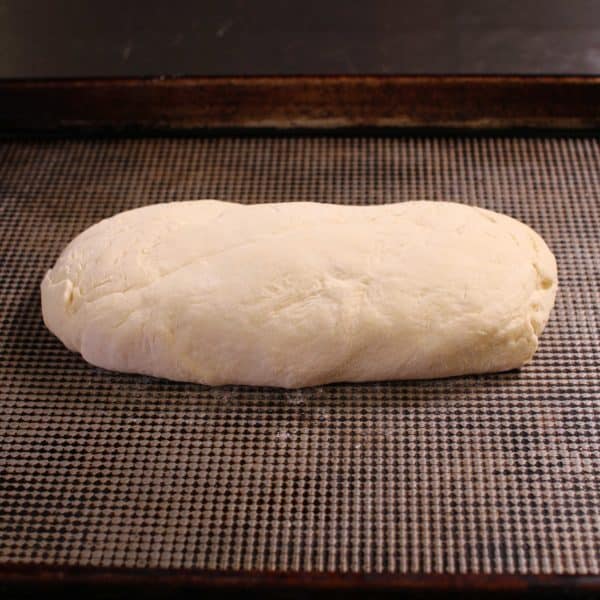
- Score and Prep for the Oven
Preheat the oven to 400°F (200°C). Use a sharp knife to score one slash across the top of the loaf. Brush with olive oil and sprinkle with kosher salt.

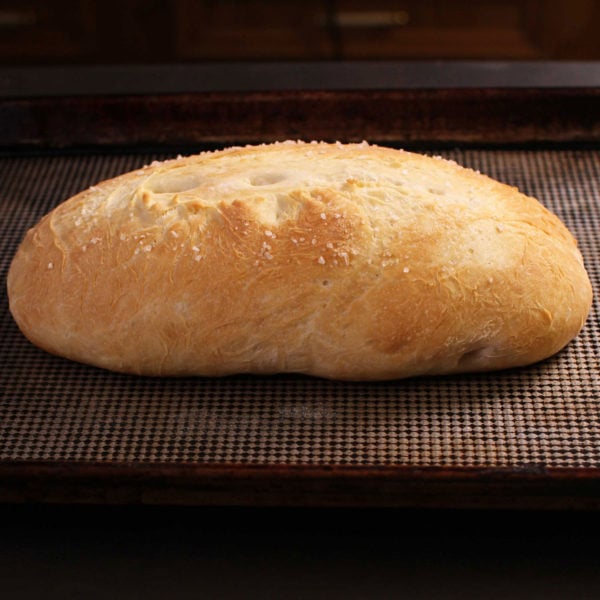
- Bake the Bread
Bake for 18–20 minutes until the crust is golden brown. Tap the bottom of the loaf. It should sound hollow when it’s done.
Expert Tips
Measure flour by weight. Weigh your flour (10 ounces or 285 grams) if you can. If you don’t have a kitchen scale, fluff the flour with a fork, spoon it into the measuring cup, and level it off with a knife. Scooping directly from the bag packs in too much and makes the bread dense.
Check your yeast. Active dry yeast needs warm water (90–100°F) to activate. If it doesn’t foam after a few minutes, it’s probably expired. Start fresh with new yeast. With a small loaf like this, even a little inactive yeast will throw off the rise.
Try the windowpane test. After kneading, pull off a small piece of dough and stretch it thin. If you can see light through it without it tearing, you’re good. If it rips, knead for another 2–3 minutes.
If your dough isn’t rising. A cold kitchen is usually the problem. Place the covered bowl in your oven with just the light on. That little bit of warmth makes a big difference.
Check for doneness. The bread is done when the crust is golden and the bottom sounds hollow when you tap it after 18–20 minutes at 400°F. If the center still seems doughy, bake for another 3–5 minutes.
Handle sticky dough gradually. If the dough sticks to your hands or the counter, sprinkle a little flour and keep working it. Add flour one tablespoon at a time rather than dumping in extra all at once.

Troubleshooting
If your small loaf French bread isn’t turning out quite right, here’s how to fix common issues like dense bread, pale crust, or dough that won’t rise.
Why is my French bread dense and heavy?
This usually means too much flour or not enough kneading. Weigh your flour when possible, or spoon it into the dry measuring cup and level it off. Scooping directly packs in too much flour. Also make sure you’ve kneaded for the full 10 minutes with a stand mixer or 15 to 20 minutes by hand. Under-kneaded dough doesn’t develop enough gluten structure to rise properly.
Why is the crust pale and not golden?
The oven wasn’t hot enough or the bread needed more time. Preheat fully before baking. The olive oil brushed on top helps the crust brown, so don’t skip it. If the crust still looks pale, tap the bottom. If it doesn’t sound hollow, bake another 3 to 5 minutes.
Why didn’t my bread dough rise?
Usually it’s the yeast. It might be expired, or the water was too hot and killed it, or too cold and it didn’t activate. Yeast works best in water between 90–100°F. If your kitchen runs cold, try letting the dough rise in your oven with just the light on. That little bit of warmth is usually enough to get things moving.
Why is my French bread doughy in the middle?
It needed more time in the oven. Tap the bottom of the loaf, it should sound hollow when it’s done. If it doesn’t, bake for another 3–5 minutes. An instant-read thermometer should read about 200°F at the center. Cutting into the bread too soon can also make it seem doughy, so let it cool for at least 10 minutes before slicing.
Why is the crust too hard?
The bread baked too long or the oven runs hot. Check the crust color at 18 minutes. If it’s already deeply golden, the bread is likely done. Oven thermometers are inexpensive and can be placed inside your oven to show the actual temperature, which is often different from the set temperature. If yours runs hot, reduce the oven temperature by 15 to 25 degrees.
Why didn’t the loaf hold its shape?
The dough was too wet or shaped too loosely. When shaping, tuck the edges under to create surface tension on top. A tight shape holds its form in the oven. If the dough feels too soft, knead in flour a tablespoon at a time until it firms up.
Serving Suggestions
This bread is great on its own with butter, but here are a few ways to use it:
- French Bread Pizza For One: Split the loaf, add sauce and toppings, and bake until bubbly.
- French Toast For One: Use day-old slices for French toast the next morning.
- Homemade Croutons: Cube leftover bread, toss with olive oil, and toast at 375°F until crispy.
Frequently Asked Questions
Bake at 400°F for 18–20 minutes. The crust should be golden brown and the bottom should sound hollow when you tap it. If the center still seems doughy, bake for another 3–5 minutes. An instant-read thermometer should read about 200°F at the center.
Yes. Mix the ingredients in a large bowl with a spoon, then knead by hand on a floured surface for 15–20 minutes until the dough is smooth and elastic. A stand mixer speeds things up, but it’s not required.
Yes. Use the same amount of instant yeast and mix it directly with the dry ingredients. You don’t need to dissolve it in water first.
Wrap the bread in a kitchen towel or place it in a resealable bag and keep it at room temperature. It stays fresh for about 2 days. You can also freeze it in an airtight bag for up to 3 months and reheat slices in a 350°F oven for about 5 minutes.
Bread flour has more protein, which gives you a chewier bread with a better rise. All-purpose flour makes a softer, lighter loaf. Either one works for this recipe.
Yes. Double all the ingredients to make two small loaves. Rising and kneading times should be about the same, but watch the dough and go by how it looks rather than the clock.
This recipe hasn’t been tested in a bread machine. If you’d like to try, King Arthur Baking has a helpful guide on converting bread recipes for bread machines.
Ways To Use Leftover Ingredients
If you have any ingredients leftover from this recipe, check out our Leftover Ingredients Recipe Finder or you might like to consider using them in any of these single serving and small batch recipes:


If you’ve tried this small batch French bread recipe or any recipe on One Dish Kitchen please let me know how you liked it by rating the recipe and telling me about it in the comment section below.
Also, if you take a picture please tag us on Instagram (@onedishkitchen) we’d love to see it!
Small Loaf French Bread
Watch How To Make This
Equipment
Ingredients
- 10 ounces all purpose flour or bread flour – (2 ¼ cups for a single loaf. If doubling the recipe, use 4 ½ cups)
- 1 teaspoon kosher salt -plus ½ teaspoon for sprinkling on top
- 1 tablespoon honey
- ½ tablespoon olive oil – plus 1 tablespoon for brushing over top.
- 6 fluid ounces warm water
- ½ teaspoon active dry yeast
Instructions
- Mix the Ingredients: In a large bowl, combine the flour, salt, honey, olive oil, and warm water. Sprinkle the yeast over the water to dissolve.
- Knead the Dough: Using a stand mixer with the paddle attachment, mix on medium speed until the dough starts to come together. Switch to the dough hook and knead for about 10 minutes until the dough is smooth and pulls away from the sides of the bowl. If kneading by hand, work the dough on a floured surface for 15–20 minutes until smooth and stretchy.
- First Rise: Cover the bowl with plastic wrap and let the dough rise in a warm spot for about 1 hour, or until it doubles in size. Press a finger into the dough. If the indent stays, it's ready.
- Deflate and Rest: Turn the dough onto a lightly floured surface and gently knead 4–5 times to push out the air. Cover with a dish towel and let it rest for 10–15 minutes.
- Shape the Dough: Form the dough into a round boule, an oval, or a 6×3-inch rectangle for a baguette shape. If making a baguette, press the ends down with the heel of your hand to seal them. Place on a baking sheet, cover with a towel, and let rise for about 1 hour until puffy.
- Score and Prep: Preheat the oven to 400°F (200°C). Use a sharp knife to score one slash across the top of the loaf. Brush with 1 tablespoon of olive oil and sprinkle with 1/2 teaspoon of kosher salt.
- Bake: Bake for 18–20 minutes until the crust is golden brown. Tap the bottom of the loaf. It should sound hollow when it's done.
- Serve: Let cool for a few minutes, then slice and enjoy warm.
Notes
-
- Measure flour by weight. Weigh your flour (10 ounces or 285 grams) if you can. If you don’t have a kitchen scale, fluff the flour with a fork, spoon it into the measuring cup, and level it off with a knife. Scooping directly from the bag packs in too much and makes the bread dense.
- Check your yeast. Active dry yeast needs warm water (90–100°F) to activate. If it doesn’t foam after a few minutes, it’s probably expired. Start fresh with a new packet.
- Try the windowpane test. After kneading, pull off a small piece of dough and stretch it thin. If you can see light through it without it tearing, you’re good. If it rips, knead for another 2–3 minutes.
- If your dough isn’t rising. A cold kitchen is usually the problem. Place the covered bowl in your oven with just the light on. That little bit of warmth makes a big difference.
- Check for doneness. The bread is done when the crust is golden and the bottom sounds hollow when you tap it. If the center still seems doughy, bake for another 3–5 minutes.
- Handle sticky dough gradually. If the dough sticks to your hands or the counter, sprinkle a little flour and keep working it. Add flour one tablespoon at a time rather than dumping in extra all at once.
- Stir all the ingredients together in a large bowl with a spoon until combined.
- Turn the dough out onto a lightly floured surface and shape it into a rough ball.
- Using the heel of your hand, push the dough away from you, then fold the far edge back toward you and press down. Repeat.
- If the dough gets sticky, sprinkle a little flour as you go. After about 3 minutes it should start to smooth out.
- Keep kneading for 15–20 minutes total until the dough is smooth and stretchy.
Nutrition
The information shown is an estimate provided by an online nutrition calculator. It should not be considered a substitute for a professional nutritionist’s advice.


I made the small loaf French bread , my family loved it and was super easy to make ! Great recipe, it’s a keeper . Thank you Jude
Thank you! A keeper is the best compliment a recipe can get. So glad your family loved it.
This is my go bread recipe… easy and delicious… started adding bread booster to all my breads..what a difference in texture…. Just like bakery bread
Excellent little loaf! We had it slathered with butter with white bean soup. It was delicious and easy and I will make it regularly! Thanks!
Thank you so much! Buttered French bread with white bean soup sounds like such a lovely pairing. So glad it’ll be a regular for you!
I don’t specifically use or buy honey or olive oil. What can I use in place of both?
The honey isn’t strictly necessary. It adds a subtle warmth to the flavor, but the bread will still rise and bake well without it. If you’d like to include something, 1 teaspoon of granulated sugar works in its place. For the olive oil, vegetable oil, canola oil, or melted butter all work well as substitutes. Use the same amount called for in the recipe.
I love making bread. I have worked bread doughs before and am always happy to find one that doesn’t need a lot of work.
Thank you
I’m so glad you’re enjoying it! It’s such a great recipe when you want homemade bread without all the extra work.
I have made this recipe at least a dozen times, and it’s a big hit every time. I can’t make sundaysupper without making a loaf of this bread. Today I tried something different. I added a tablespoon of fresh, chopped rosemary and half a cup of Irish cheese to the first dough mix. It was amazing, and I highly recommend it to anybody who wants to try it. Thank you for this wonderful recipe.
I’m so glad you’ve been enjoying the bread, that’s wonderful to hear! Your addition of rosemary and cheese sounds absolutely delicious, I love that idea.
Thanks for this recipe. I threw everything in the bread machine and it turned out fine. The first time I forgot to add the olive oil and salt to the outside and it still turned out fine. I think mine might be a little denser than your picture shows. That may be because I can’t seem to cut a slit in the top! I am still working on it hahaha. I did use instant yeast and I used gram weight for the flour.
All in all it worked fine in my bread machine.
I’m so glad it worked well in your bread machine!
If it’s coming out a little denser, it could be related to the rise time or shaping, but it sounds like you’re very close. And don’t worry about the slit, that definitely takes a little practice. I’m so happy the recipe is working for you!
Great recipe! Have made this several times now.
As a single person your recipes have been a godsend for me. Plus I might add, a few friends I’ve introduced to you!
Again a big HUGE Thank You to you and your team for all the testing to bring us single (or 2) serves !
BTW
I ‘fluff’ my flour with a whisk 😁 then scoop and level.
I also now always use my instant read thermometer. It’s not just for meats! but for baking as well. I test the water temperature for yeast and for the finished baked bread. Water for yeast should be between 100° and 110° F (38° and 43° C).
For the bread I aim for about 200°F (93°C) although just under that is OK. I was always taking my breads out way too early but this has worked every time for me.
It truly means a lot to hear that the recipes have been helpful to you, and I love that you’ve introduced your friends to One Dish Kitchen.
Fluffing the flour and using an instant read thermometer are both such smart habits – temperature makes a big difference with yeast. I’m so glad the recipe has been working so well for you!
Excellent!