This post may contain affiliate links. Please read our disclosure policy.
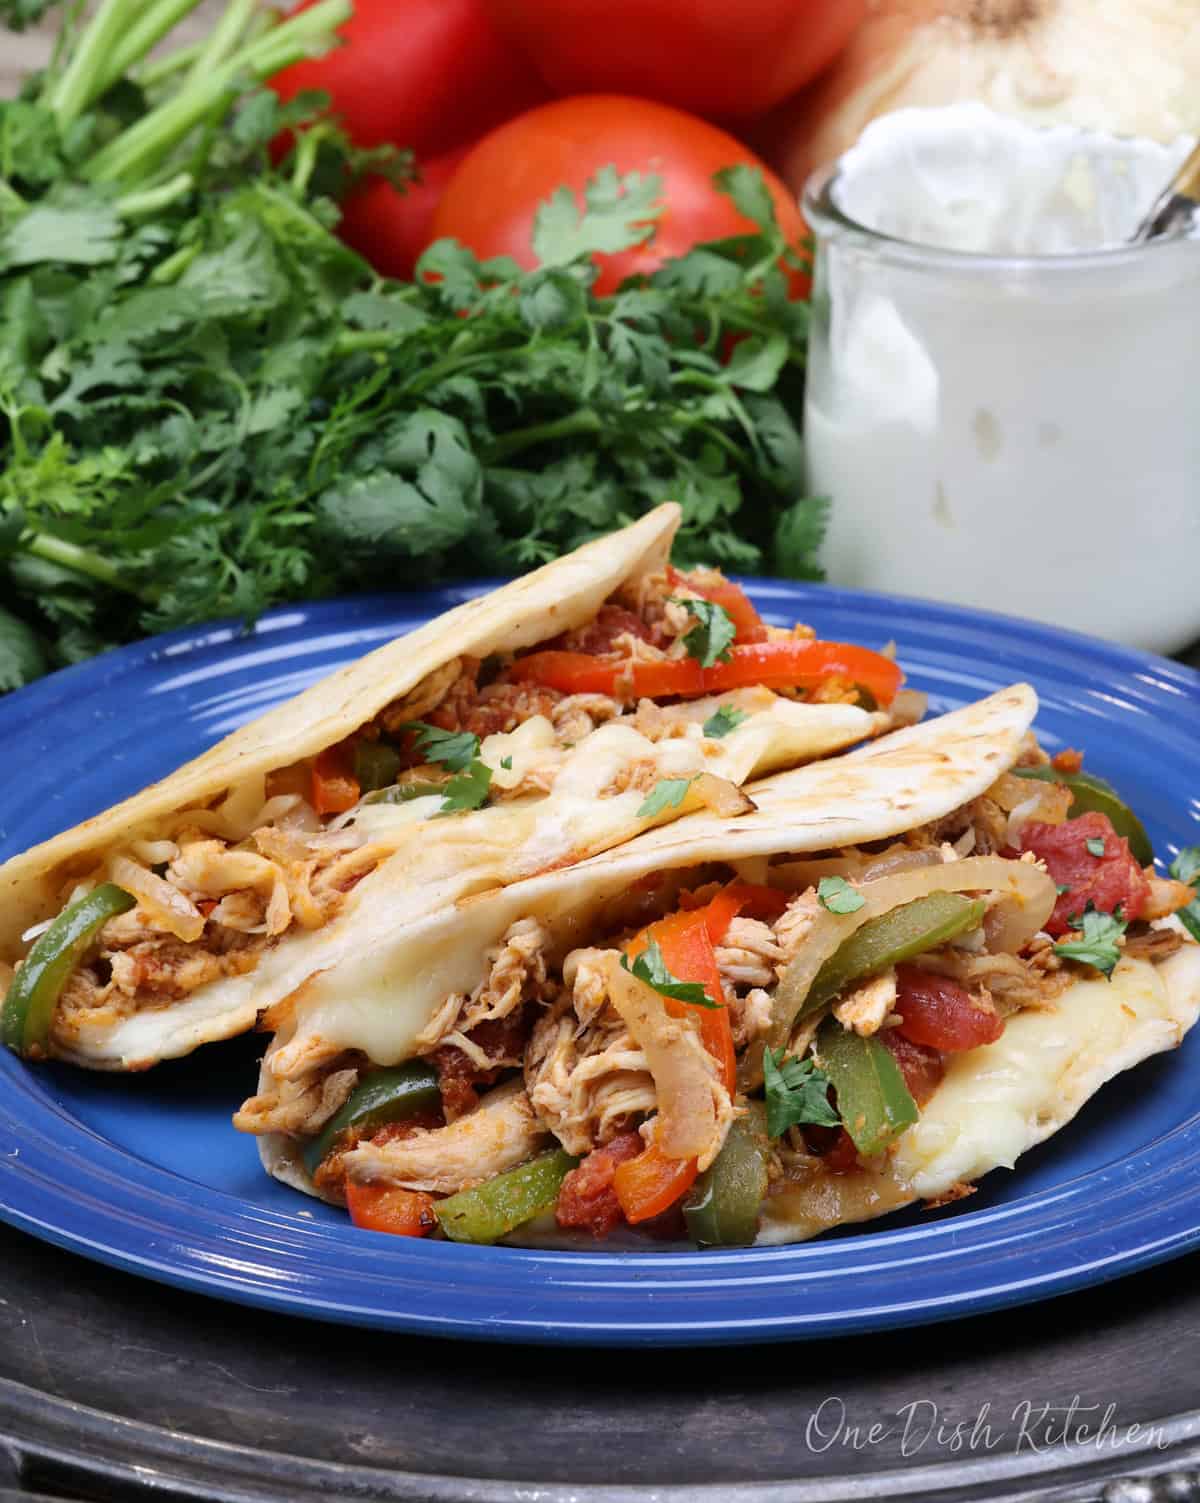
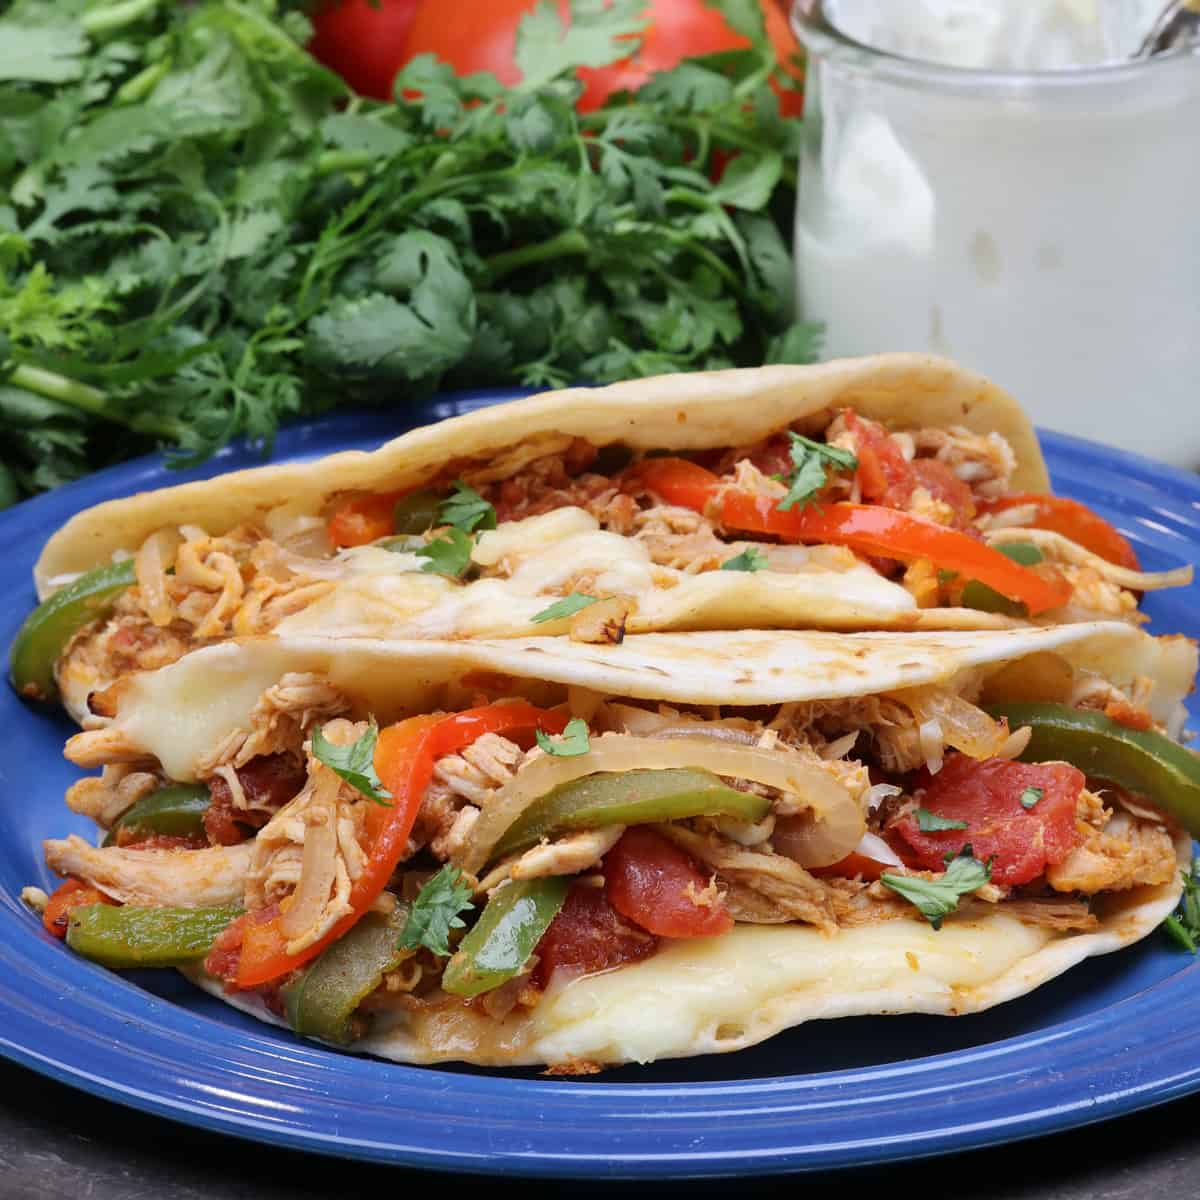
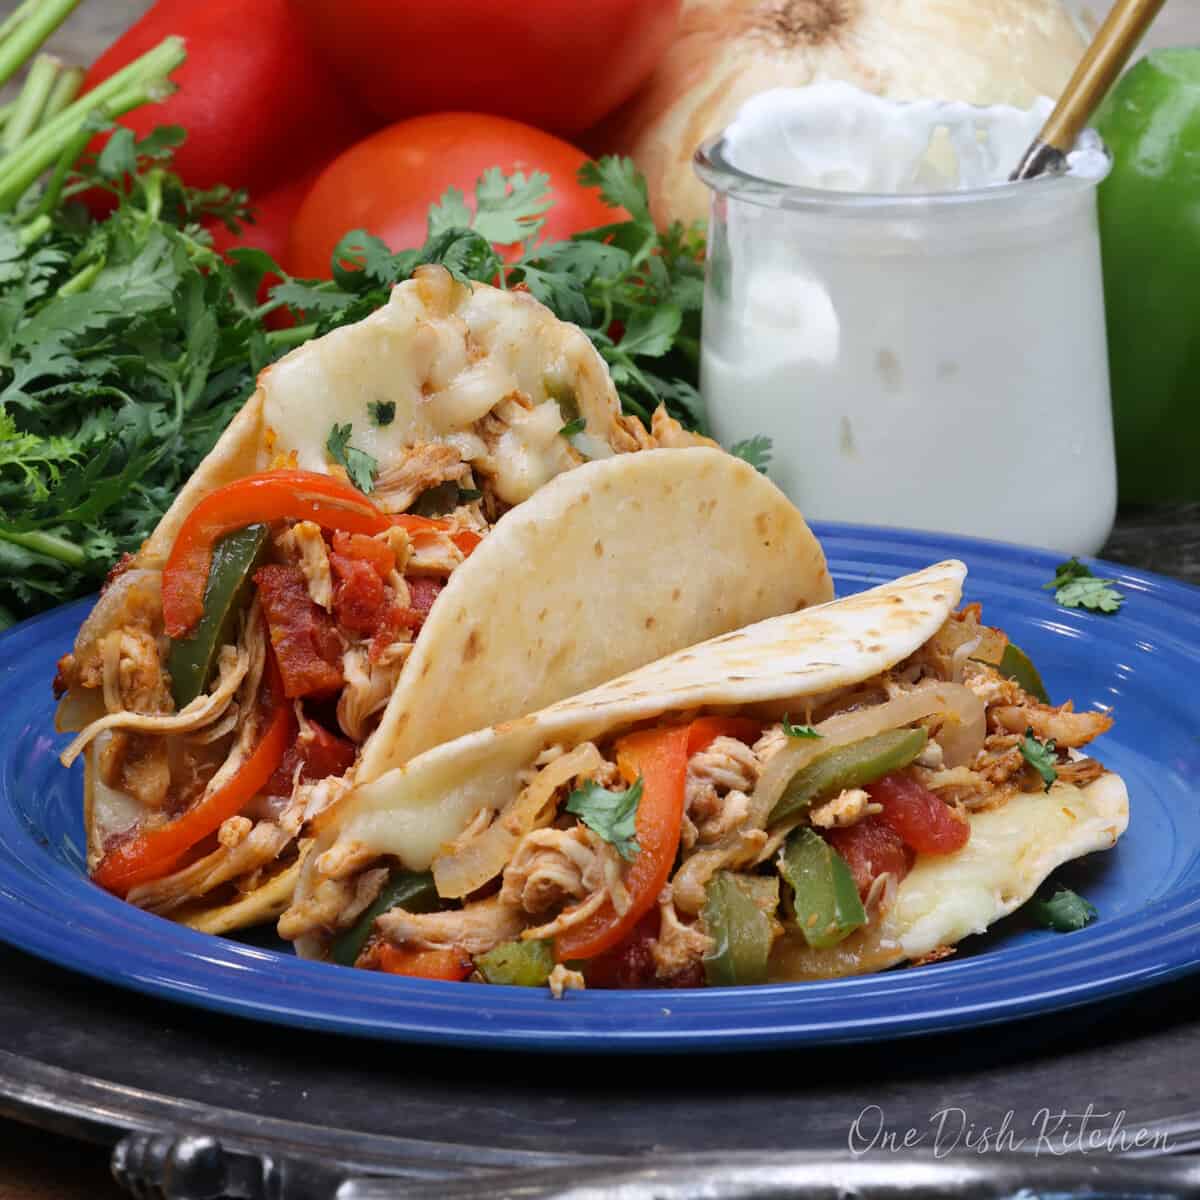
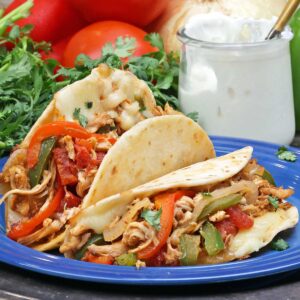
These single serving chicken tacos are packed with seasoned shredded chicken, sautéed peppers and onions, and melty cheese, all crisped to perfection in a skillet. Ready in just 20 minutes, they’re quick, flavorful, and easy to make with simple ingredients.
Why You’ll Love This Recipe
- Perfectly Portioned: Designed for one, so there’s no need to scale down a larger recipe and deal with leftovers.
- Quick and Easy: Use leftover cooked chicken, rotisserie, or even canned chicken for a fast, flavorful meal.
- Fully Customizable: Load up your tacos with your favorite toppings, from fresh vegetables to salsa.
- Easy to Double: Want to make chicken tacos for two? Just double the ingredients.
I love this chicken tacos recipe because it’s a quick, flavorful way to turn leftover chicken into something special. Just add the right seasoning, warm tortillas, and your favorite toppings. No leftovers? Cook a chicken breast using the easy method below. Either way, it’s a simple, satisfying meal.
Enjoy chicken tacos with our small batch guacamole, pickled red onions, Spanish rice for one, single serve salsa, or Mexican corn dip for one.

Ingredients
If you have any ingredients leftover from this soft chicken tacos recipe, check out our Leftover Ingredients Recipe Finder.
- Olive Oil: Used for sautéing. Avocado oil works too.
- Shredded Cooked Chicken: The main component of your tacos. Leftover or rotisserie chicken is ideal, but if starting from scratch, here are two quick methods:
- Oven Method: Preheat the oven to 400°F. Place a boneless, skinless chicken breast in a baking dish, drizzle with olive oil, and season with salt, pepper, and any other spices. Bake for 20-25 minutes until cooked through.
- Skillet Method: Cut a chicken breast into 1-inch strips, season as desired, and cook in a skillet with 1 tablespoon of butter for about 6 minutes, flipping halfway.
- Bell Pepper: Adds color and crunch. Use red and green for contrast or mix any colors you like. Leftover bell peppers can be used in Sheet Pan Greek Chicken or Mexican Street Corn Salad.
- Onion: Enhances flavor. White or yellow onions are mild and balanced, while red onions add a sharper bite and a pop of color.
- Seasonings: The key to bold, flavorful tacos:
- Cumin: Warm, earthy, and essential in Mexican dishes.
- Garlic Powder: Adds a subtle garlicky depth.
- Chili Powder:Provides mild heat and richness.
- Smoked Paprika: A touch of smokiness and vibrant color.
- Oregano: Herbal freshness to round out the flavors.
- Salt: Brings all the flavors together.
- Diced Tomatoes: Use about 1/4 of a 14.5-ounce can (around 3.5 ounces). Scoop both the diced tomatoes and their juice for maximum flavor. Leftovers can be used in Chicken Paprika, Spanish Rice, or Chicken Cacciatore.
- Tortillas: Use 2 store-bought or homemade flour tortillas.
- Shredded Cheese: Monterey Jack melts beautifully, but cheddar, mozzarella, or your favorite cheese work just as well. Use extra cheese in chicken enchiladas for one.
- Butter: Melting a little butter in the skillet crisps up the tacos for a quesadilla-like crunch. This step is optional but highly recommended. Use salted or unsalted butter.
Recipe Variations
Chicken tacos are easy to customize to your taste. Here are a few ideas:
- BBQ Chicken Tacos: Toss the shredded chicken in barbecue sauce and top with coleslaw for a tangy crunch.
- Buffalo Chicken Tacos: Coat the chicken in buffalo sauce and serve with blue cheese dressing and celery sticks.
- Taco Salad: Skip the tortillas and serve the chicken over lettuce with cheese, salsa, and tortilla strips for crunch.
- Vegetarian Tacos: Swap the chicken for grilled portobello mushrooms, black beans, or tofu. Use vegan cheese and dairy-free sour cream for a plant-based option.
How To Make Chicken Tacos
These photos and instructions help you visualize how to make shredded chicken tacos. See the recipe below for ingredient amounts and full recipe instructions.
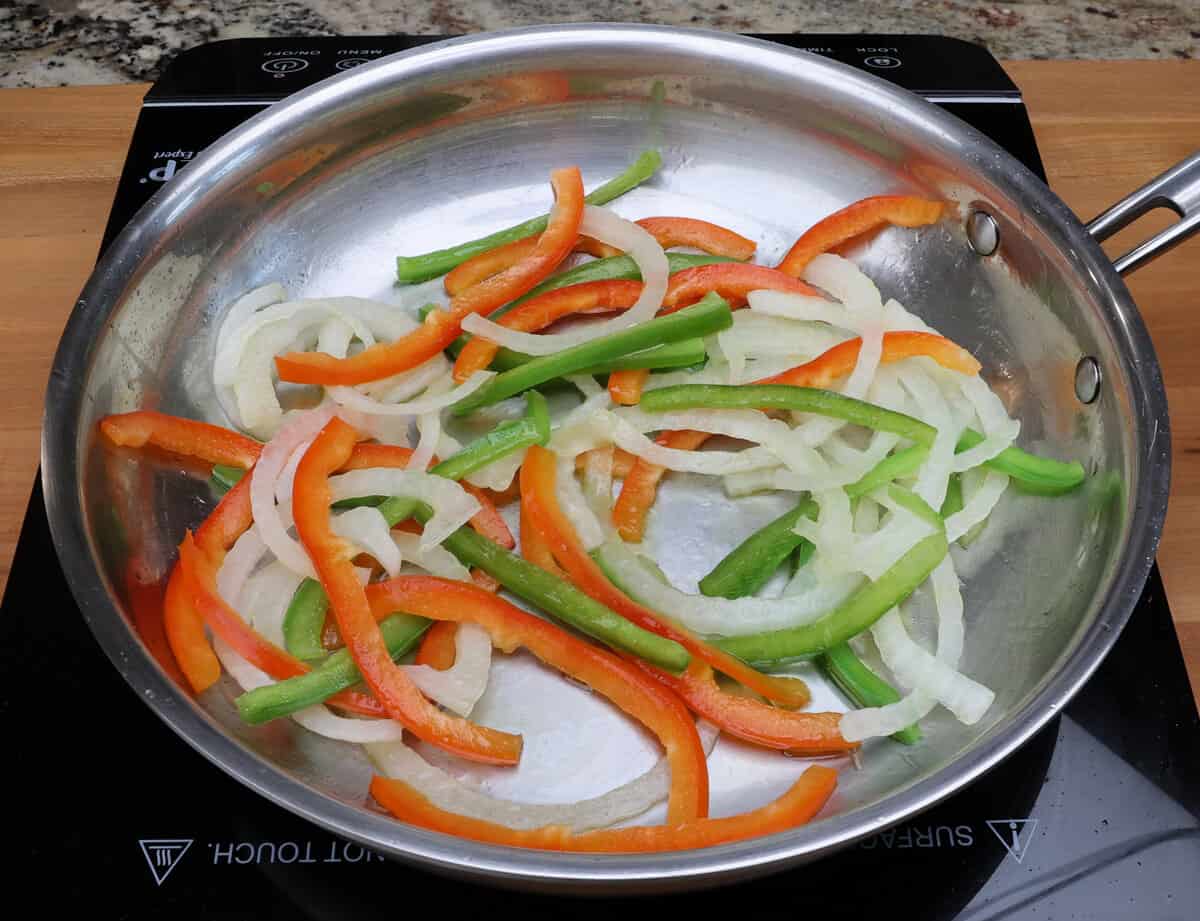
- Heat the Oil: In a 10-inch skillet over medium heat, add the olive oil.
- Sauté the Vegetables: Add the bell peppers and onions. Cook, stirring occasionally, for 4-5 minutes until they soften.
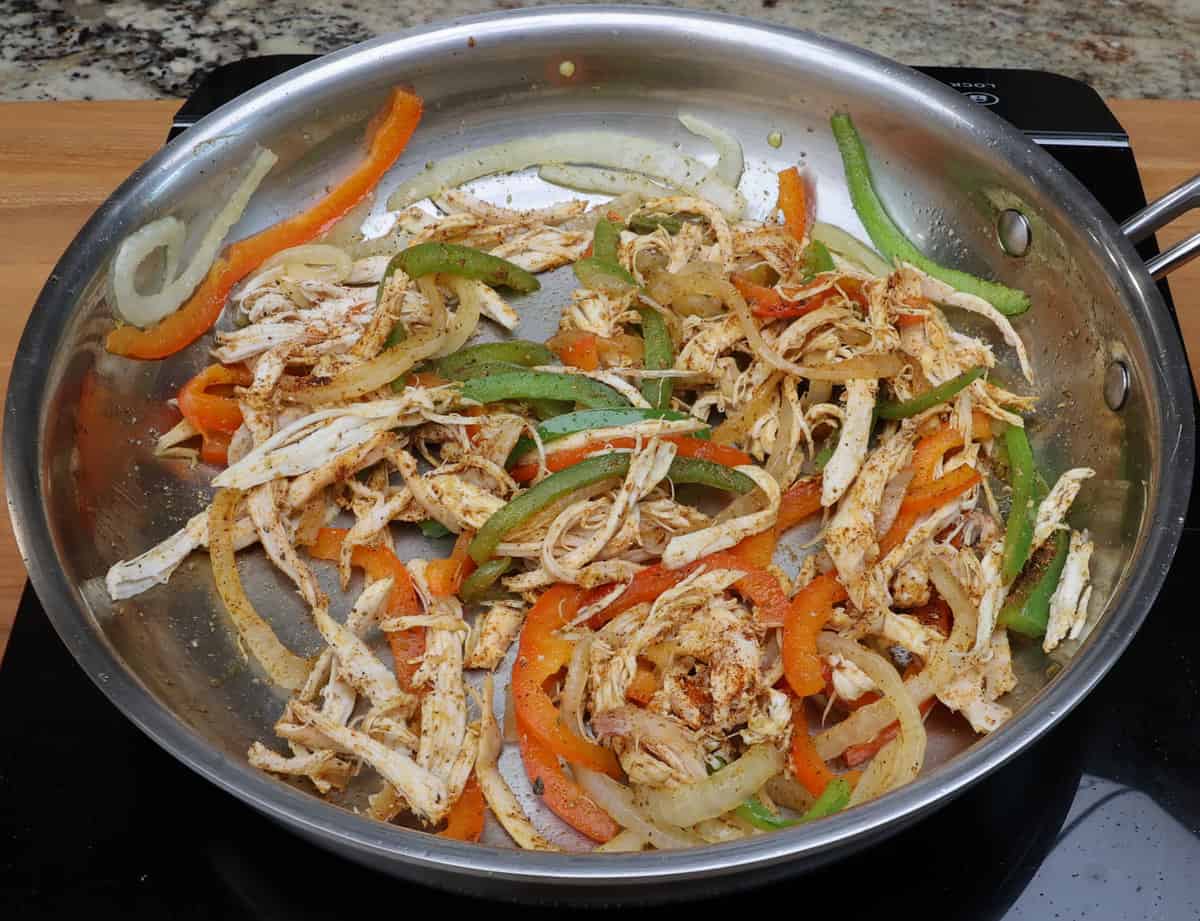
- Add Chicken and Seasonings: Stir in the shredded chicken and sprinkle the seasonings over the top. Mix well to coat the chicken evenly.
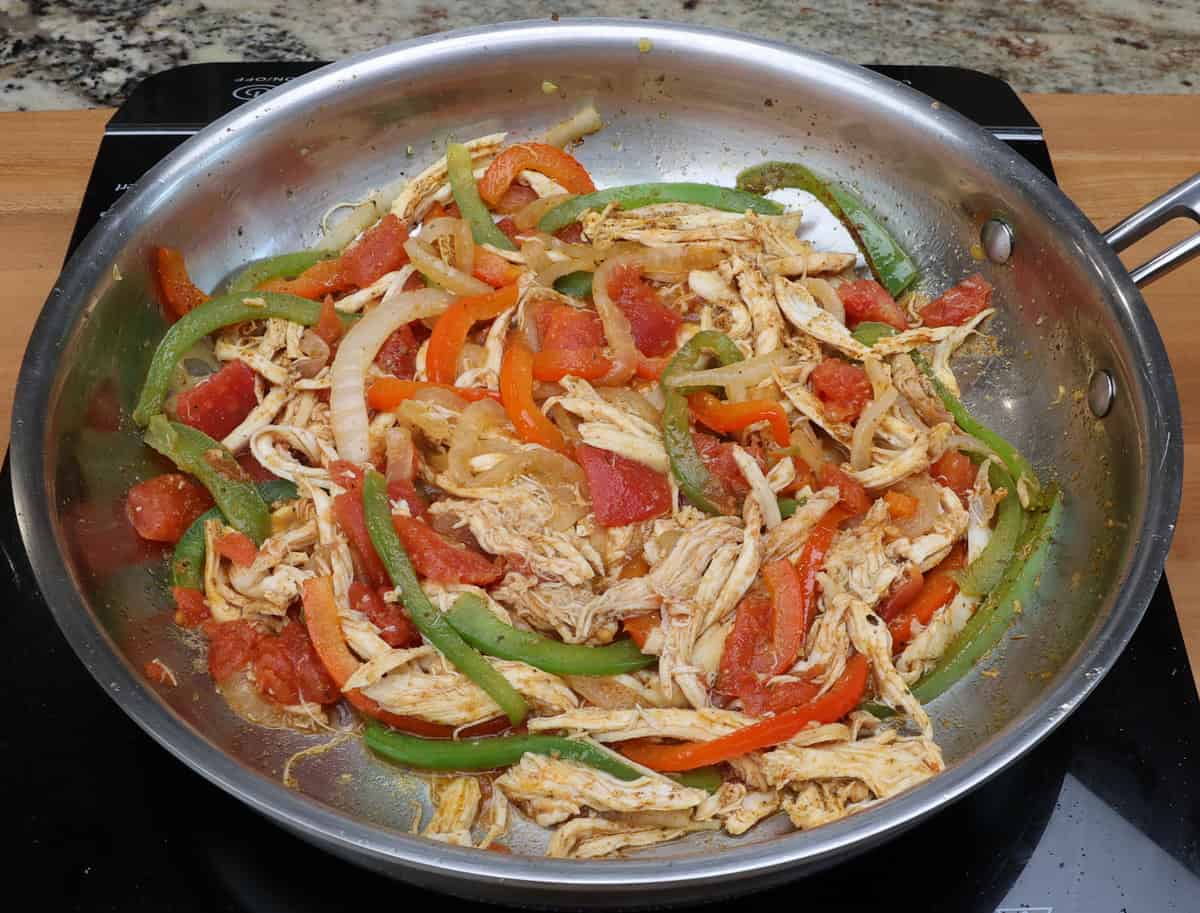
- Add Tomatoes and Water: Pour in the water and add the diced tomatoes. Let everything simmer for 3-5 minutes until heated through.
- Melt the Butter: In a separate skillet, melt the butter over medium heat.
- Assemble the Tacos: Lay the tortillas on a flat surface. Spoon the chicken mixture onto each tortilla and top with shredded cheese. Fold them in half. Place the tacos in the buttered skillet.
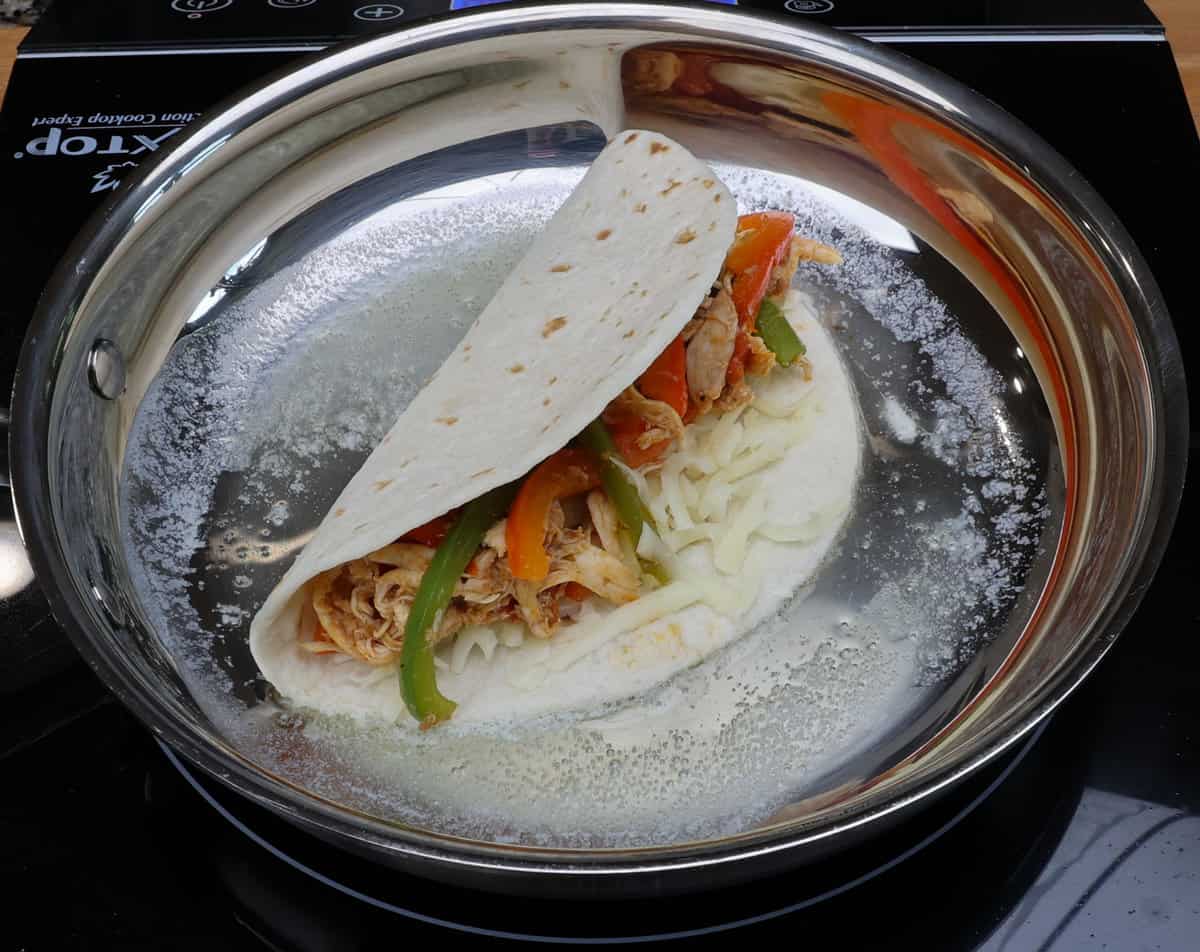
- Crisp the Tacos: Cook for 2-3 minutes per side until golden and crispy.

- Serve: Remove from the skillet, add your favorite toppings, and enjoy!
Expert Tips
- Read Before You Start: Skim through the recipe, ingredient notes, and any process photos before cooking. This will help you understand each step and ensure great results.
- Adjust the Seasoning: Taste as you go and tweak the spices to your liking. Everyone has different preferences, so feel free to add more or less of any spice.
- Use Butter for Crispy Tacos: A little butter in the skillet helps prevent sticking, adds flavor, and gives the tortillas a crisp, golden texture.
- Don’t Overstuff: Evenly distribute the chicken and cheese in the tortillas for a balanced bite. Overfilling can lead to tearing or spilling.
- Serve Immediately: Tacos are best right after cooking—crispy tortillas, melty cheese, and fresh flavors.
Frequently Asked Questions
Yes! Rotisserie chicken is a great time-saver. Just shred it and mix it with the seasonings in the skillet.
You can prep the chicken and vegetable mixture in advance, but it’s best to crisp the tacos right before serving.
If you have leftovers, store the chicken mixture in an airtight container in the fridge for up to 3 days. Reheat before assembling new tacos.
Yes! Let it cool completely, then store in a freezer-safe container for up to 2 months. Thaw and reheat before using.
Yes! This recipe scales easily if you want to make chicken tacos for two or more. Just adjust the ingredients accordingly.
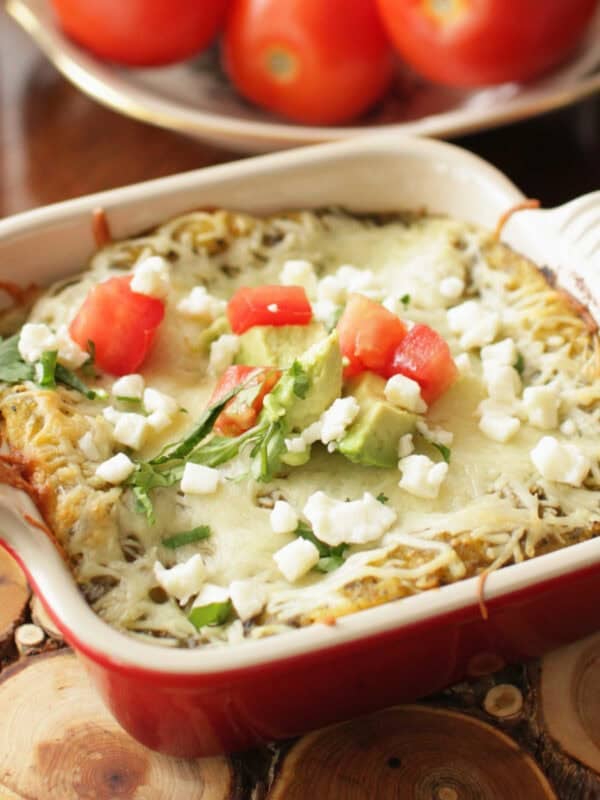
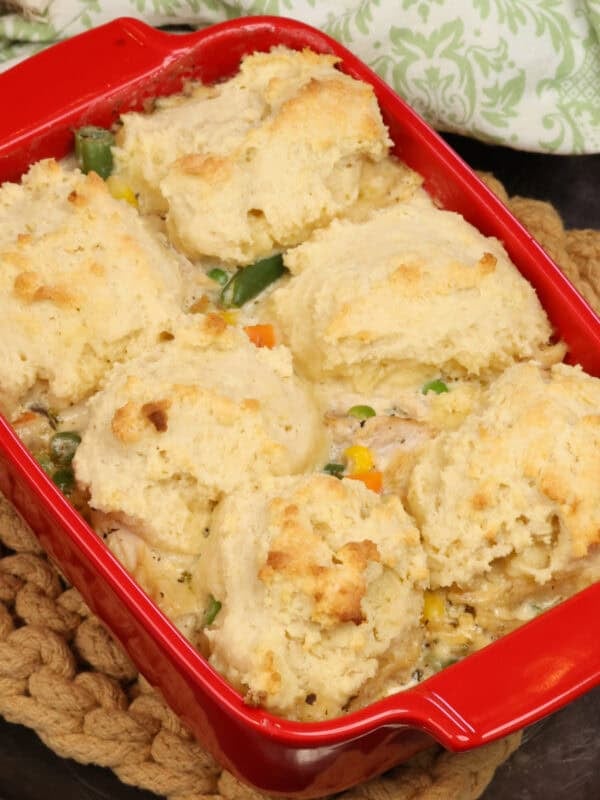
More Single Serving Taco Recipes
Looking for more taco options? Try these flavorful, perfectly portioned recipes:
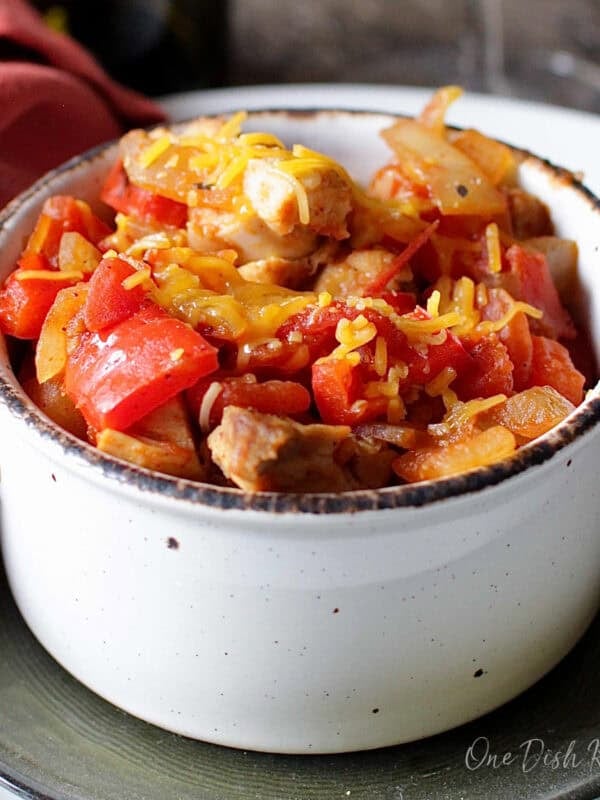
Ways To Use Leftover Ingredients
If you have any ingredients leftover from this recipe, check out our Leftover Ingredients Recipe Finder or you might like to consider using them in any of these single serving and small batch recipes:
If you’ve tried this single serving chicken tacos recipe or any recipe on One Dish Kitchen please let me know how you liked it by rating the recipe and telling me about it in the comment section below.
If you take a picture please tag us on Instagram (@onedishkitchen) we’d love to see it!
Chicken Tacos For One
Equipment
Ingredients
- 1 tablespoon olive oil
- 1 cup shredded cooked chicken (about 3 ounces)
- ½ small red bell pepper -sliced into strips
- ½ small green bell pepper -sliced into strips
- ¼ small onion -sliced
- ¼ teaspoon ground cumin
- ¼ teaspoon garlic powder
- ¼ teaspoon chili powder
- ¼ teaspoon smoked paprika
- ¼ teaspoon dried oregano
- ⅛ teaspoon salt
- 1 ½ tablespoons water
- 3.5 ounces canned diced tomatoes (about ¼ of a 14.5 ounce can)
- 2 (8-inch) flour tortillas
- ½ cup shredded monterey jack cheese (about 2 ounces)
- ½ tablespoon butter
- Optional for topping: sour cream, sliced jalapeños, guacamole, sliced avocados, and/or chopped cilantro
Instructions
- In a 10-inch skillet over medium heat, add the olive oil.
- Add the bell peppers and onions. Cook, stirring occasionally, for 4-5 minutes until they soften.
- Stir in the shredded chicken and sprinkle the cumin, garlic powder, chili powder, smoked paprika, oregano, and salt over the top. Mix well to coat the chicken evenly.
- Pour in the water and add the diced tomatoes. Let everything simmer for 3-5 minutes until heated through.
- In a separate skillet, melt the butter over medium heat.
- Lay the tortillas on a flat surface. Spoon the chicken mixture onto each tortilla and top with shredded cheese. Fold them in half.
- Place the tacos in the buttered skillet and cook for 2-3 minutes per side until golden and crispy.
- Remove from the skillet, add your favorite toppings, and enjoy!
Notes
- Read Before You Start: Skim through the recipe, ingredient notes, and any process photos before cooking. This will help you understand each step and ensure great results.
- Adjust the Seasoning: Taste as you go and tweak the spices to your liking. Everyone has different preferences, so feel free to add more or less of any spice.
- Use Butter for Crispy Tacos: A little butter in the skillet helps prevent sticking, adds flavor, and gives the tortillas a crisp, golden texture.
- Don’t Overstuff: Evenly distribute the chicken and cheese in the tortillas for a balanced bite. Overfilling can lead to tearing or spilling.
- Serve Immediately: Tacos are best right after cooking—crispy tortillas, melty cheese, and fresh flavors.
Nutrition
The information shown is an estimate provided by an online nutrition calculator. It should not be considered a substitute for a professional nutritionist’s advice.


This turned out great! It was still too much but I have a small appetite. That’s ok.. later, I had the rest. The canned diced tomatoes are great to work with and I freeze the contents of a can in portions for one-dish recipes. It works really well.
I hadn’t thought of freezing the tomatoes. Good tip😁
We had these for dinner today and they were delicious. Did not double the recipe and still had enough for my husband and I with a little left over. Added sour cream and guacamole after I cooked the filled tortillas in butter. We will look forward to having this again.
Love your recipes, so tasty.
Thank you so much!
Great recipe.
Thank you!