This post may contain affiliate links. Please read our disclosure policy.
This small batch hummus is thick, creamy, and loaded with garlic and lemon. One can of chickpeas and about 10 minutes, and you won’t want store-bought again.
Featured Comment
“This hummus is soooo good. I’ll never buy store brands again. Love it, love it, love it!!”
– Lila
Quick Look
- Prep Time: 10 minutes
- Total Time: 10 minutes
- Equipment: Food processor or blender
- Servings: 6 (about 1½ cups)
- Difficulty: Easy
- Flavor Profile: Garlicky and bright with fresh lemon, a nutty tahini richness, and a thick, scoopable texture with a little bit of body to it.
A classic homemade hummus made with canned chickpeas, tahini, garlic, and lemon. Fresh-tasting, ready in minutes, and great as a dip or spread.
Why I Make This Small Batch Hummus

I’ve been making this small batch hummus for years because it just works. One can of chickpeas blended with tahini, lemon, and garlic, and the whole thing is done in about 10 minutes.
The flavor is what sells it for me. Fresh lemon, real garlic, and good tahini taste nothing like the containers in the refrigerated aisle. After homemade, store-bought tastes flat.
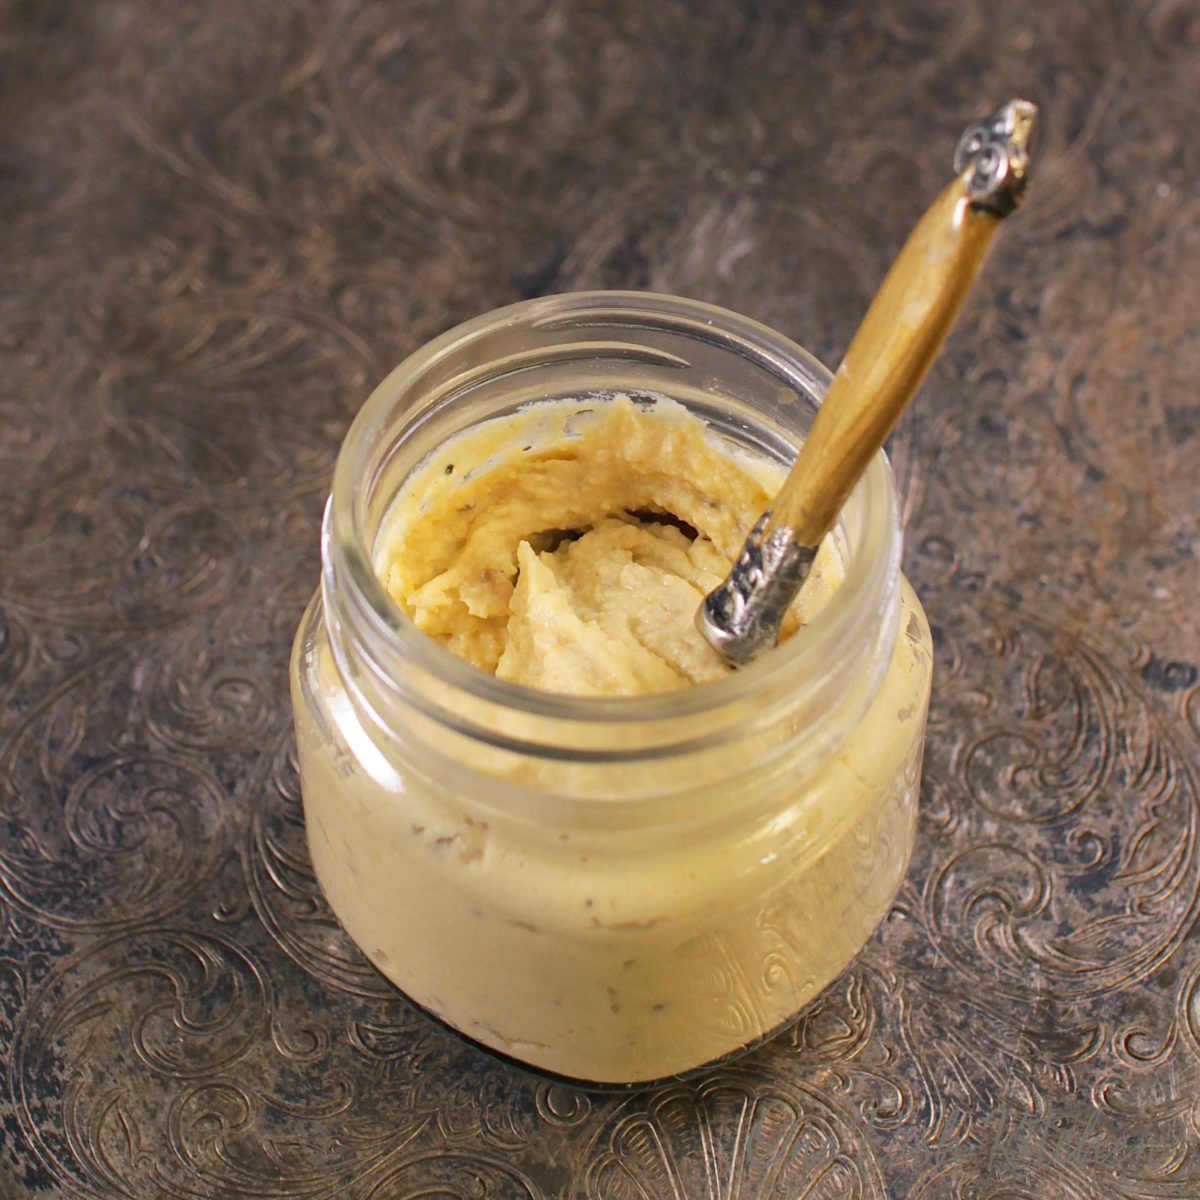
This recipe makes about 1½ cups, enough for one person for a few days or for two to split over a couple of meals.
The texture has a little body to it, not whipped into nothing. That’s how I like it. If you prefer it thinner, a splash of water or olive oil at the end loosens it to whatever consistency you want.
I’ve tested enough hummus recipes to know what works in 10 minutes and what doesn’t. This is the version I make at home.
For more small batch hummus recipes, try my Small Batch Black Bean Hummus and Small Batch Black Eyed Pea Hummus, or use this one in my Hummus Crunch Salad.
Small Batch Hummus Ingredients
Here’s what each ingredient brings to the recipe, with notes on what works best. If you have any ingredients leftover, check out our Leftover Ingredients Recipe Finder.
Canned chickpeas: One 15-ounce can, drained, gives you about 1½ cups. Rinse them well before blending so the hummus tastes clean. If using dried chickpeas, soak ¾ cup overnight and cook until tender, then measure out 1½ cups for the recipe. Cannellini beans work as a substitute, but the flavor will be milder.
Tahini: This is the ingredient that separates real hummus from a chickpea puree. Tahini is sesame seed paste, and the brand matters more than people think. I use Soom and Mighty Sesame, both pour easily and have a fresh, nutty flavor. Stir well before measuring because tahini separates in the jar. Sunflower seed butter works as a substitute. Use extra tahini in my small batch baba ganoush.
Fresh lemon juice: I prefer using the juice from a fresh lemon, not bottled juice. One small lemon or ½ of a medium lemon usually gives you enough juice for this recipe.
Garlic: One clove is enough for this batch. Raw garlic is sharp, and a little goes a long way in a small amount of hummus. Use fresh garlic, not jarred or powdered, for the cleanest flavor.
Olive oil: Extra virgin olive oil gets blended in for richness and used on top for serving.
Ground cumin: A small amount of cumin adds warmth and that classic Middle Eastern flavor. Skip it if you don’t have it, but it’s worth keeping on hand.
Salt and black pepper: Start with ½ teaspoon of each and adjust to taste.
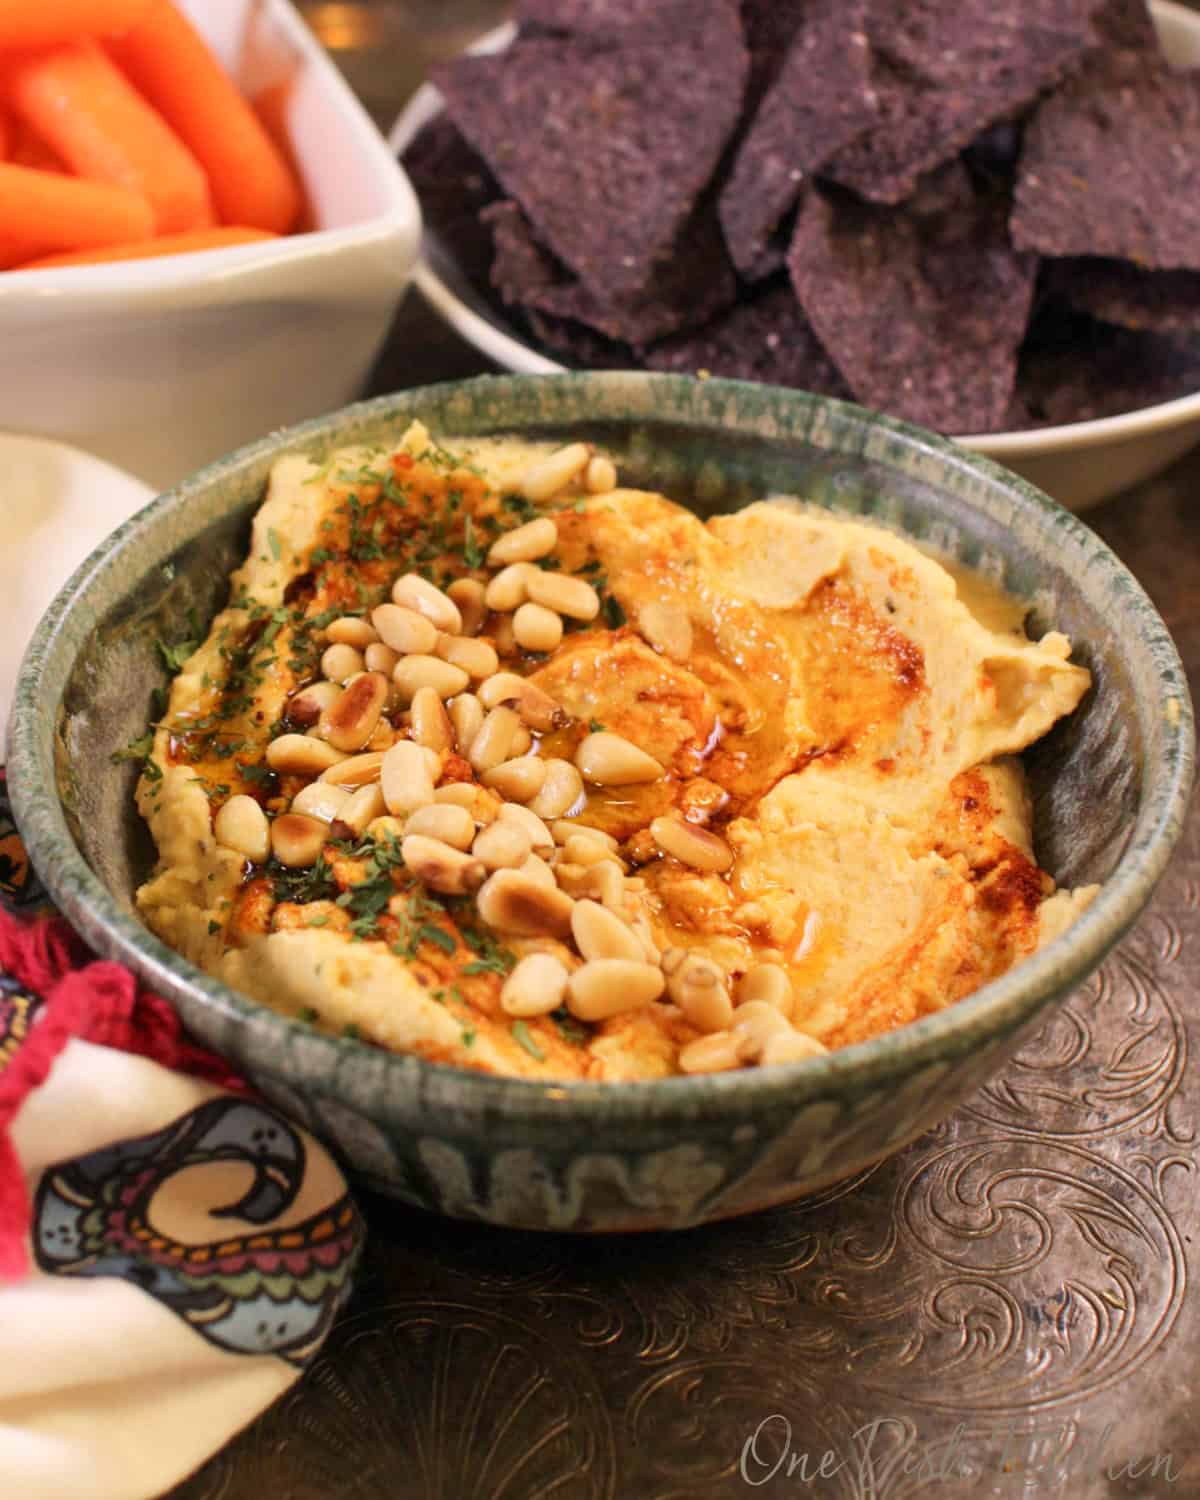
Optional toppings: Toasted pine nuts, a drizzle of olive oil, and a sprinkle of smoked paprika and finely chopped parsley.
Recipe Variations
This homemade hummus recipe works well as a base for other flavors. Here are a few ways to change it up.
Roasted red pepper hummus: Blend in 1 roasted red pepper (from a jar, drained and patted dry) with the chickpeas. Add a pinch of smoked paprika.
Roasted garlic hummus: Swap the raw garlic clove for 3 to 4 roasted garlic cloves. The flavor is sweeter and mellower.
Spicy hummus: Add ⅛ teaspoon cayenne pepper or ½ teaspoon Sriracha to the base recipe. Taste after blending and add more if you want more heat.
Herb hummus: Blend in ¼ cup rough chopped, loosely packed fresh parsley or cilantro with the chickpeas for a brighter, greener hummus.
Lemon herb hummus: Add an extra tablespoon of lemon juice and ¼ cup fresh basil or dill. Good as a sandwich spread.
How To Make Hummus
This easy hummus recipe comes together in one step: everything goes into the food processor at once. See the recipe box below for ingredient amounts.
- Drain and rinse the chickpeas. Open the can, drain the liquid (reserving a few tablespoons of the liquid/aquafaba if you want to use it to thin your hummus later) and rinse under cool water.
- Add everything to the food processor. Combine the chickpeas, olive oil, tahini, lemon juice, garlic, cumin, salt, and black pepper in a mini food processor or blender.
- Blend until smooth. Process for 1 to 2 minutes, scraping down the sides as needed. If the hummus is too thick, add 1 tablespoon of water, olive oil, or chickpea liquid at a time until you reach the consistency you want.
- Taste and adjust: Check the salt, lemon juice, and garlic. Adjust to your preference.
- Serve or store: Spoon into a bowl and top with a drizzle of olive oil, toasted pine nuts, and a sprinkle of smoked paprika if you like. Store leftovers in an airtight container in the fridge for up to 4 to 5 days.
Expert Tips
Rinse the chickpeas well. The liquid in the can is starchy and salty. Leaving it on the chickpeas dulls the fresh lemon and tahini flavor. A good rinse under cold water makes a noticeable difference.
Stir your tahini before measuring. Tahini separates in the jar, with oil on top and thick paste on the bottom. If you scoop from the bottom without stirring, you’ll get a dry, pasty hummus. Stir the whole jar until it’s smooth and pourable, then measure.
Blend longer than you think. Most people underblend. Give it a full 1 to 2 minutes of processing, scraping down the sides halfway through. The longer blending time breaks down the chickpea skins and makes the texture noticeably smoother.
Thinning the hummus. I use cold water or olive oil to thin, but aquafaba (chickpea liquid) works incredibly well too.
Add an ice cube for a lighter texture. Drop one ice cube into the food processor before blending. The cold water whips air into the hummus as it melts, making it lighter and fluffier. This is a well-known restaurant trick.
Peel skins for extra creamy hummus. If you have extra time and you want to make hummus that is extra creamy, peel the skins off the cooked chickpeas before you purée them. The best way to do that is work with about ½ can of chickpeas at a time, drain them and rub them vigorously between two large paper towels. That will make it much easier to slip off the skins.
Making hummus without tahini. It still works. Add an extra tablespoon of olive oil or a splash of water to help the chickpeas blend smoothly. The hummus will be lighter in flavor but still good. Sunflower seed butter is another option if you want that richness back.
Troubleshooting
If your homemade hummus isn’t turning out quite right, here is how to fix common issues like gritty texture, bland flavor, or a bitter aftertaste.
Why is my hummus gritty or grainy?
Underblending is the most common cause. Process for a full 1 to 2 minutes, scraping down the sides halfway through. If it’s still grainy, add 1 tablespoon of water and blend again.
Why is my hummus too thick?
Add water or olive oil, one tablespoon at a time, while the food processor is running. Water thins it without changing the flavor. Olive oil adds richness. Blend after each addition until you reach the consistency you want.
Why is my hummus bland?
It needs more salt, more lemon juice, or both. Chickpeas absorb a lot of seasoning. Add a pinch of salt, blend, and taste. If it still tastes flat, squeeze in more lemon juice to bring the other flavors forward.
Why does my hummus taste bitter?
Old or rancid tahini is the most common cause. Taste your tahini on its own before adding it. It should taste nutty and mild, not sharp. If your garlic has a visible green center (the germ), remove it before mincing, as it can add bitterness. Too much lemon juice can also push the flavor in that direction, so add it gradually and taste as you go.
Can I fix hummus that has too much garlic?
Yes. Add more tahini and a squeeze of lemon juice, then blend again. The extra tahini dilutes the garlic intensity, and the lemon helps rebalance the flavor. Adjust the salt after.
What To Serve With Hummus
This homemade hummus works as a dip, a spread, or a base for bigger meals.
Frequently Asked Questions
One serving of hummus is about ¼ cup. This recipe makes about 1½ cups, which is 6 servings. Each serving has approximately 152 calories based on this recipe’s ingredients.
4 to 5 days in the fridge, stored in an airtight container. Press a piece of plastic wrap directly onto the surface of the hummus before sealing the container. This prevents a dry skin from forming on top.
Yes. Homemade hummus freezes well for up to 3 months. Spoon it into a freezer-safe container and leave a little room at the top for expansion. Thaw overnight in the fridge and stir well before serving. The texture may be slightly thicker after freezing, so add a splash of water or olive oil to loosen it.
Yes. The hummus will still be smooth, just less rich and nutty. Add an extra tablespoon of olive oil or a splash of water to help the chickpeas blend. Sunflower seed butter is another substitute that adds a similar richness.
Hummus should not sit out for more than 2 hours. Like any perishable food, bacteria can grow quickly at room temperature. If you’re serving it at a party or gathering, keep the portion small and refrigerate the rest.
Yes. Soak ¾ cup of dried chickpeas overnight and cook until tender. Measure out 1½ cups of cooked chickpeas for this recipe. Dried chickpeas take longer but some people prefer the flavor and texture over canned.
Yes. Halve this recipe and use half a can of chickpeas to make a single serving of hummus. Store the remaining chickpeas in the fridge for up to 3 days or freeze them for later.
RELATED: Simple Canned Bean Recipes
Ways To Use Leftover Ingredients
If you have any ingredients leftover from this recipe, check out our Leftover Ingredients Recipe Finder or you might like to consider using them in any of these single serving and small batch recipes:

If you’ve tried this small hummus recipe or any recipe on One Dish Kitchen please let me know how you liked it by rating the recipe and telling me about it in the comment section below.
If you take a picture please tag us on Instagram (@onedishkitchen) we’d love to see it!
Small Batch Hummus

Equipment
- mini food processor or blender
Ingredients
- 1 (15-ounce) can chickpeas
- ⅓ cup olive oil
- 3 tablespoons tahini
- 2 tablespoons lemon juice
- 1 clove garlic – chopped
- ½ teaspoon ground cumin
- ½ teaspoon kosher salt
- ½ teaspoon coarsely ground black pepper
- Optional toppings: ¼ cup toasted pine nuts, ½ tablespoon olive oil, and ¼ teaspoon smoked paprika
Instructions
- Drain and rinse the chickpeas under cool water.
- Add the chickpeas, olive oil, tahini, lemon juice, garlic, cumin, salt, and pepper to a food processor or blender.
- Blend for 1 to 2 minutes, scraping down the sides halfway through, until the hummus is smooth and creamy.
- If the hummus is too thick, add water one tablespoon at a time and blend until you reach the consistency you want.
- Taste and adjust the salt or lemon juice.
- Spoon into a serving bowl and top with a drizzle of olive oil, toasted pine nuts, and smoked paprika, if desired.
Notes
Nutrition
The information shown is an estimate provided by an online nutrition calculator. It should not be considered a substitute for a professional nutritionist’s advice.


……This was WONDERFUL! I didn’t have fresh garlic so i used garlic powder (please don’t seek to have me arrested) and it still came out great. I almost think this is a great base recipe as it would be fun to start exploring. Nonetheless, so simple and quick….AND YUMMY! Thank you!…..
I’m thrilled to hear you loved the recipe! No worries about the garlic powder—it’s all about making it work with what you have. I’m glad it turned out great for you! Enjoy experimenting with it, and thank you for your kind words!
This is delicious!! It tastes great and I know I will be making this again! I love spreading hummus on a slice of sourdough toast topped with blistered tomatoes and a few shakes of Za’atar.
I made it yesterday…delicious….I went light on the salt as I wasn’t sure how salty the peas would be but rinsing them removes most of it…I stuck to the recipe but still needed to thin it more so used about 1/4C of the drained liquid…I DID find that after it sits for a bit (like to chill in the fridge) it thickens up so next time I will thin it more…I recommend this recipe though….WAY less expensive and healthier than store bought….Thank you Joanie
Tahini can be frozen, I freeze in cubes for just the right amount of tahini for my hummus.
This hummus is soooo good. I’ll never buy store brands again. Love it, love it, love it!!
I’m so glad you love it Lila. It’s so easy and I love the flavor – I won’t buy store brands either. Thanks so much for taking the time to let me know you enjoyed it.
Joanie – can you suggest a brand of tahini that you use. I know nothing about it. Thanks.
Eileen, There are a few brands I like a lot, they are Peloponnese Tahini, Whole Foods 365 Organic Tahini, and Trader Joe’s has a brand of tahini that’s good too.
Here’s a great tip I got. If you peel the skin of chickpeas the hummus will be creamier! It works!