This post may contain affiliate links. Please read our disclosure policy.
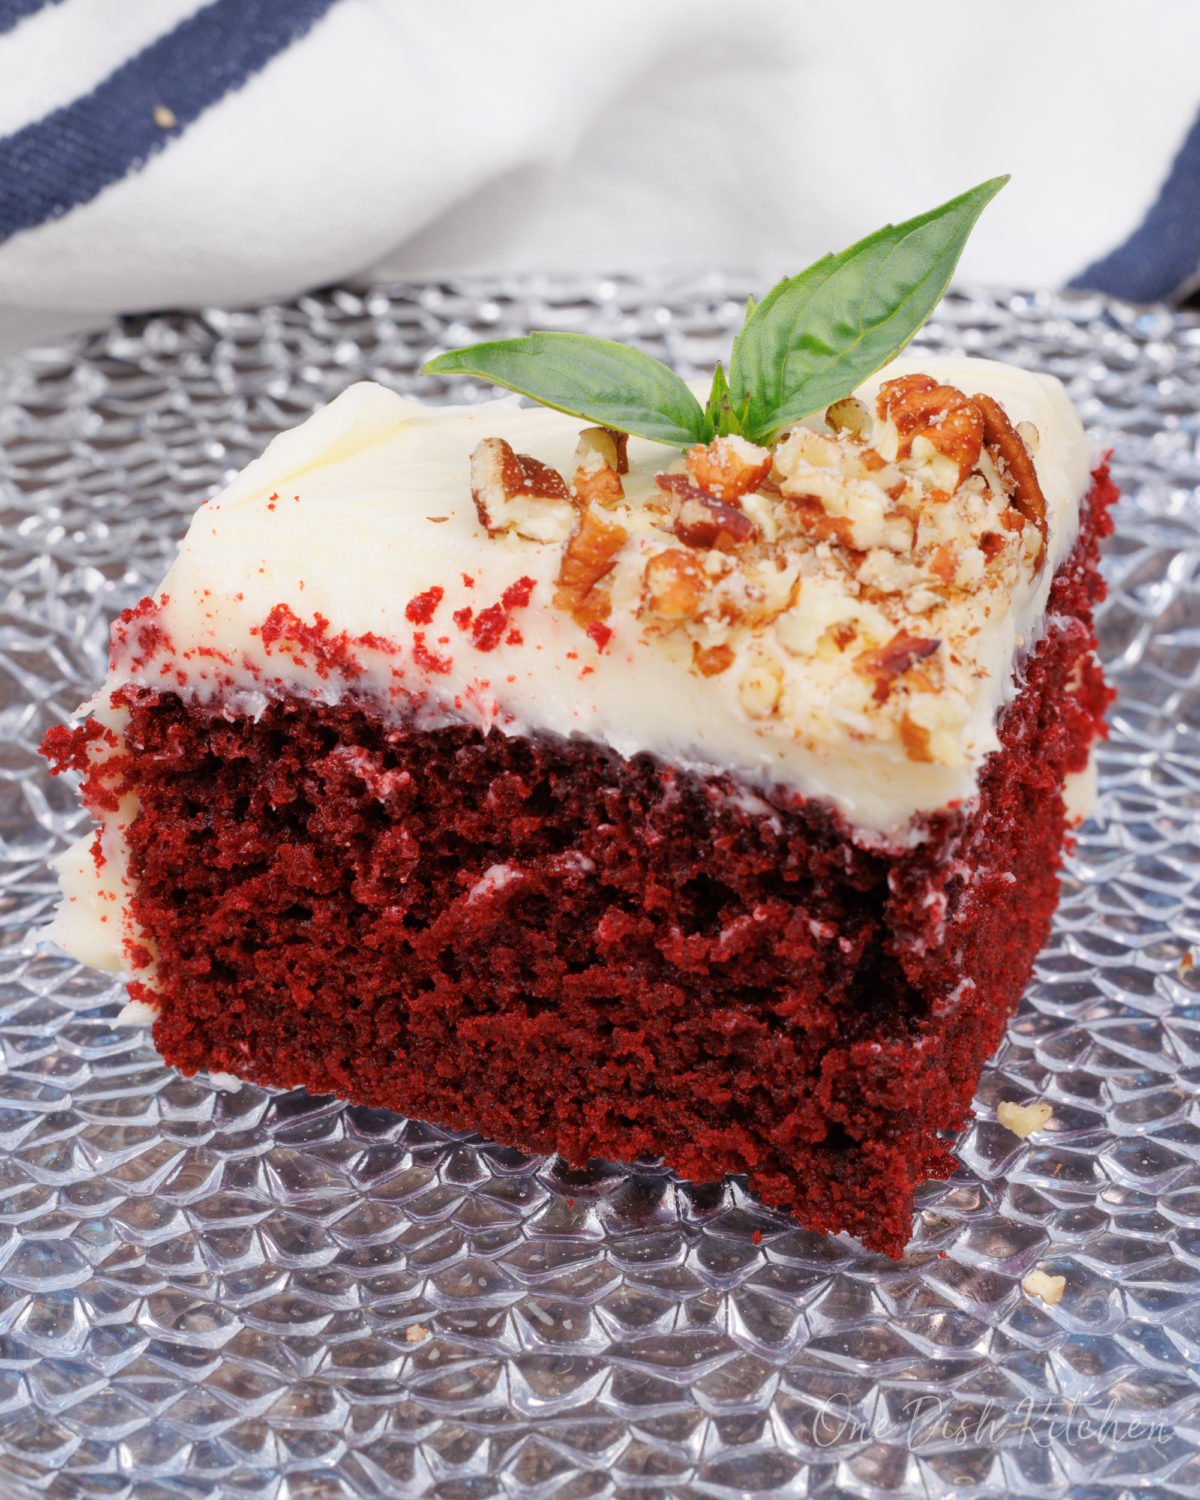
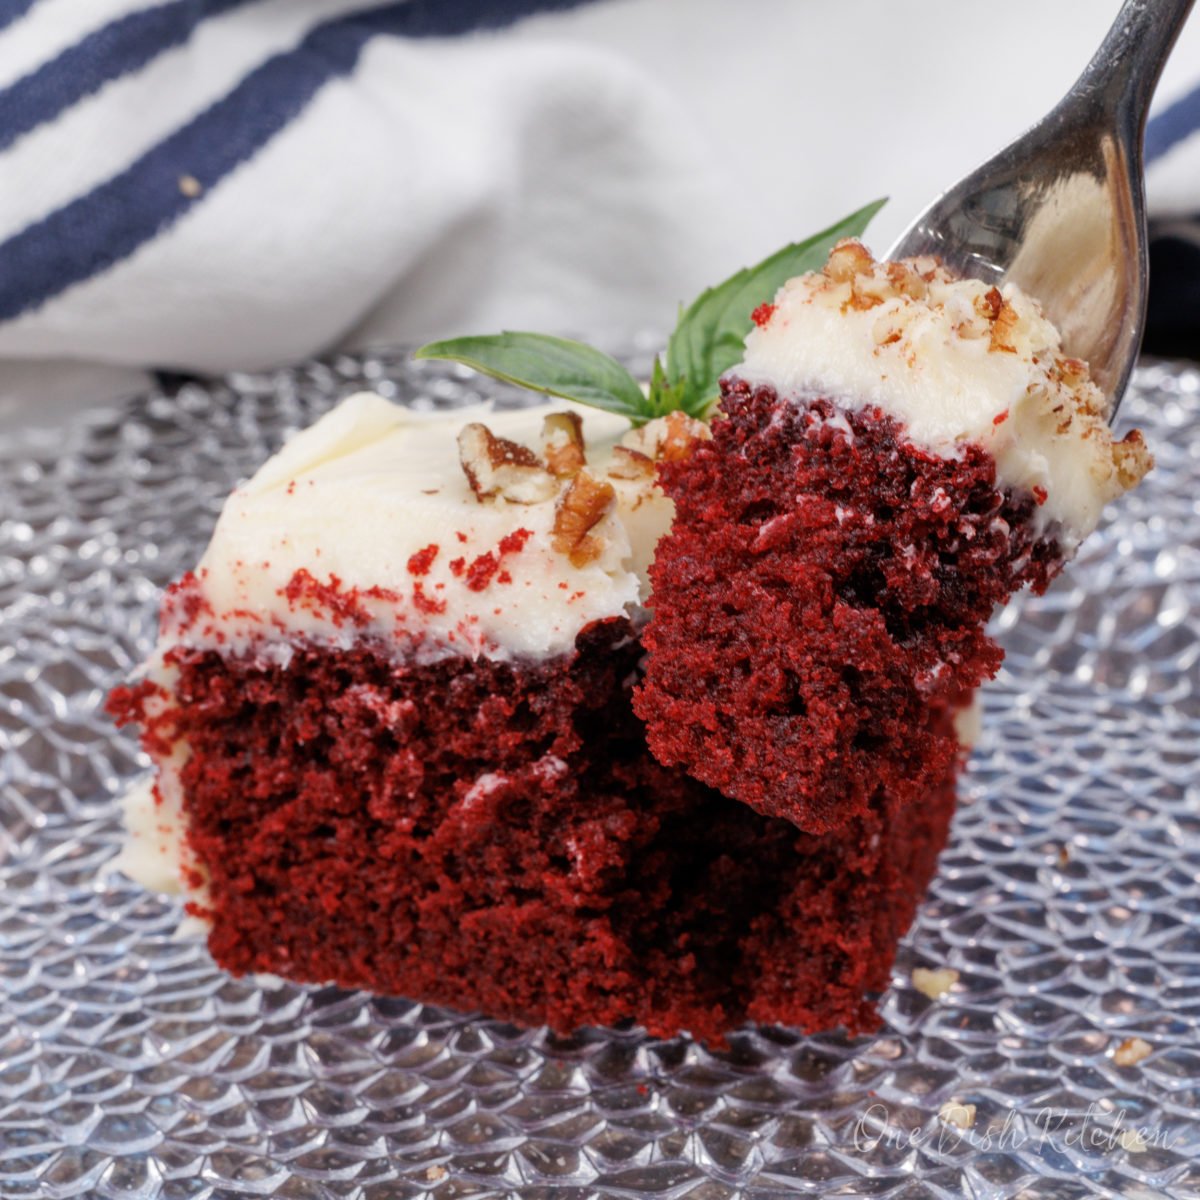
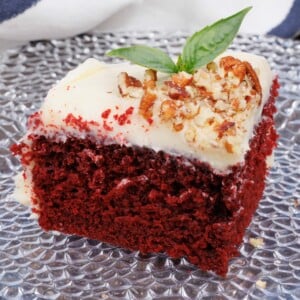
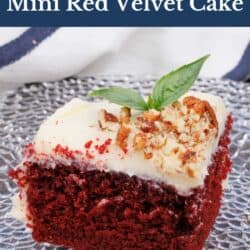
This Mini Red Velvet Cake is incredibly soft, tender, and rich with a hint of cocoa, then topped with a smooth, creamy, and irresistible cream cheese frosting. This small homemade cake is perfect for any occasion, whether you’re treating yourself or sharing with someone special.
Featured Comment
Wonderful recipe. My granddaughter’s
– Maestra
favorite – she said it was better than the bakery’s.”
Why You’ll Love This Recipe
- Perfectly Sized: Small but satisfying, ideal for a personal treat or sharing.
- Soft & Tender: Bakes up light with a velvety, delicate crumb.
- Easy to Make: Simple ingredients and quick steps for the best-tasting homemade cake.
Red velvet cake has been a favorite for generations, known for its soft, velvety texture and subtle cocoa flavor. While its exact origins are debated, it became popular during the Great Depression.
I’ve always loved how red velvet cake feels like a celebration – there’s something about that rich color and cream cheese frosting that makes it special.
This small red velvet cake delivers all the flavor of the classic in a perfectly portioned size, making it great for a personal treat or a delightful red velvet cake for two when shared.
Looking for more mini cake recipes? Try my mini devil’s food cake, mini hummingbird cake, small Texas sheet cake, single serve chocolate cake, or my mini pound cake recipe – all perfectly sized!

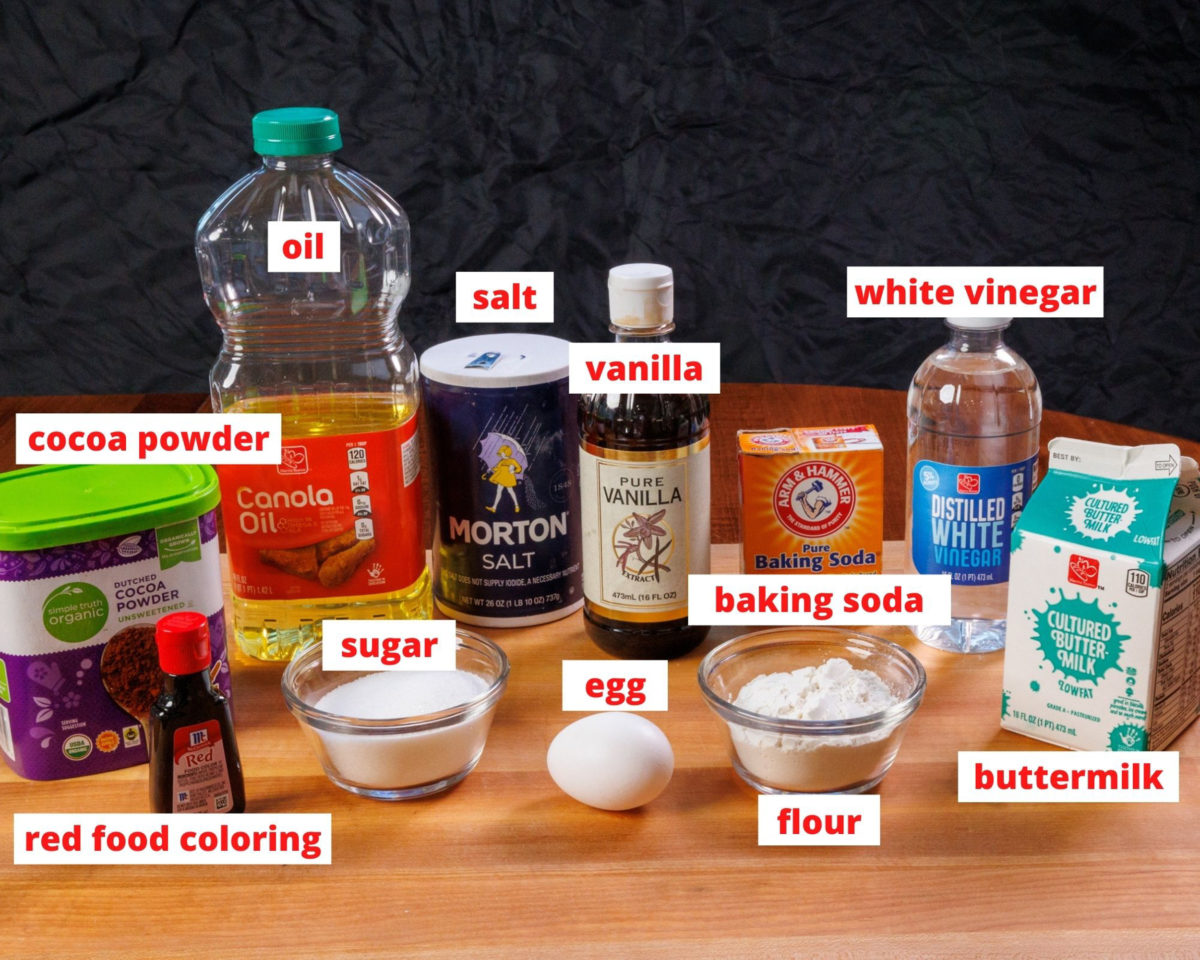
Ingredients
If you have any ingredients leftover from this single serve red velvet cake recipe, check out our Leftover Ingredients Recipe Finder.
- Red Food Coloring: Gives the cake its classic red color. McCormick is a common brand, but any will work. If using gel food coloring, use less, as it’s more concentrated.
- Vinegar: White vinegar adds a slight tang, a signature of red velvet cake.
- Buttermilk: Adds creaminess and tang while helping the cake rise. If you don’t have buttermilk, mix 1/4 cup milk with 1/2 tablespoon lemon juice or white vinegar and let it sit for 10 minutes. Leftover buttermilk? Use it in our butter swim biscuits recipe, mini buttermilk pie, buttermilk quick bread, or small batch buttermilk pancakes.
- Unsweetened Cocoa Powder: Just 1 tablespoon gives a subtle chocolate flavor. Leftovers? Try it in small batch chocolate scones, ramekin chocolate banana bread, or small batch rum balls.
For the Frosting: Cream cheese, powdered sugar, and vanilla extract.
See recipe card below for a full list of ingredients and measurements.
Recipe Variations
Customize your cake with these easy variations:
- Chocolate Chips: Stir in a handful for extra chocolate flavor.
- Orange Zest: Add 1/4 teaspoon for a hint of citrus flavor.
- Chopped Nuts: Mix in a few tablespoons of walnuts or pecans.
- Layered Cake: Divide the batter between two 10-ounce ramekins for a mini layer cake.
How To Make A Red Velvet Cake
These photos and instructions help you visualize how to make this Mini Red Velvet Cake recipe. See the recipe box below for ingredient amounts and full recipe instructions.
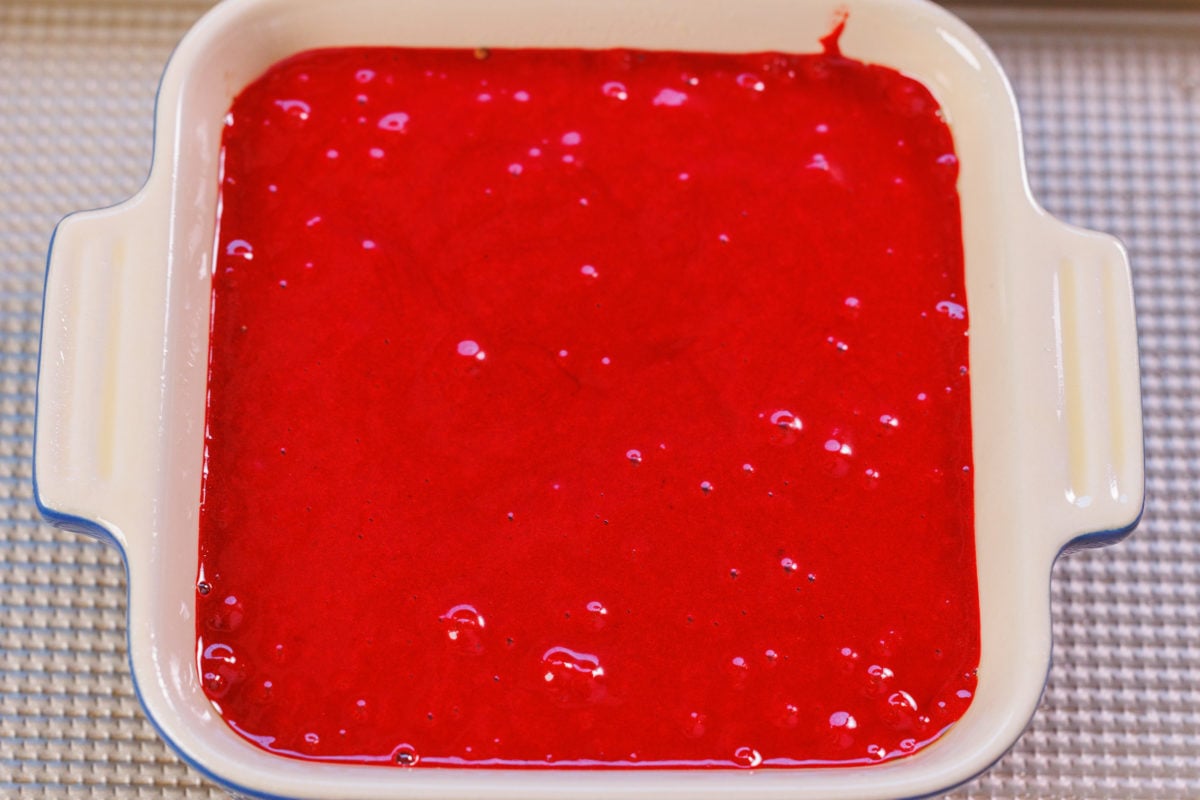
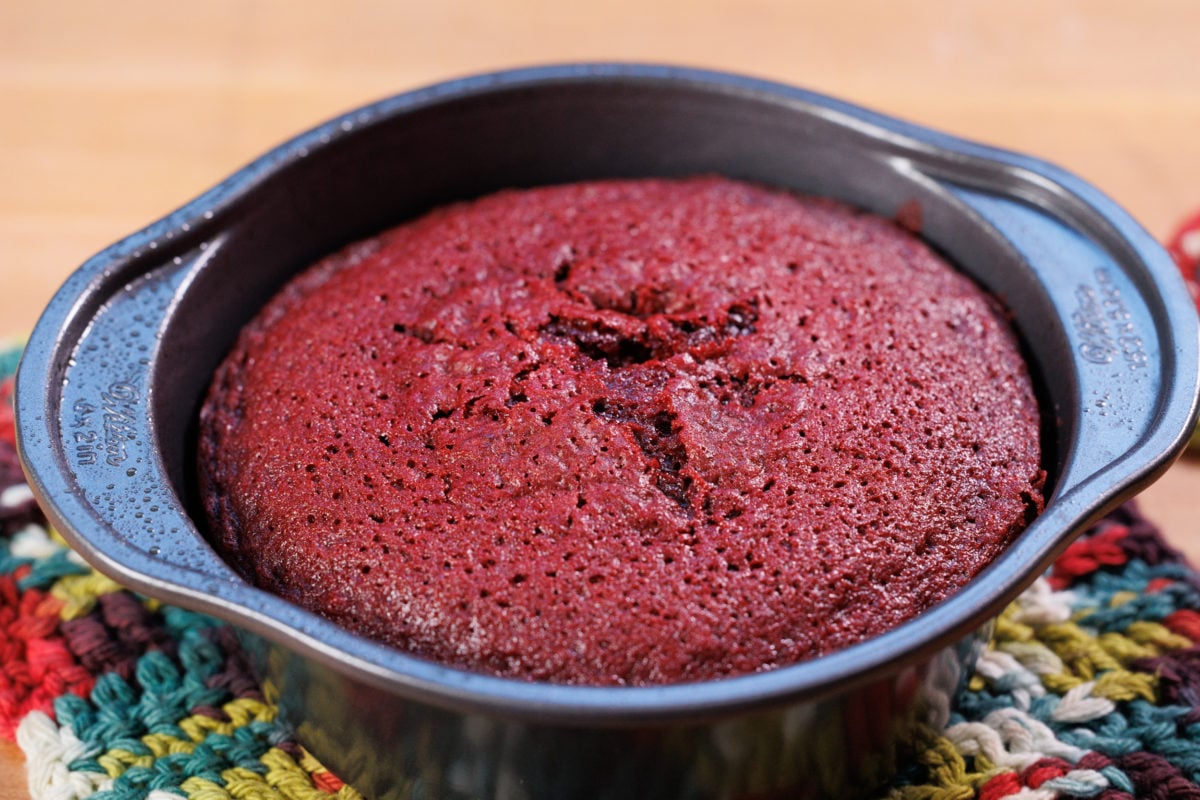
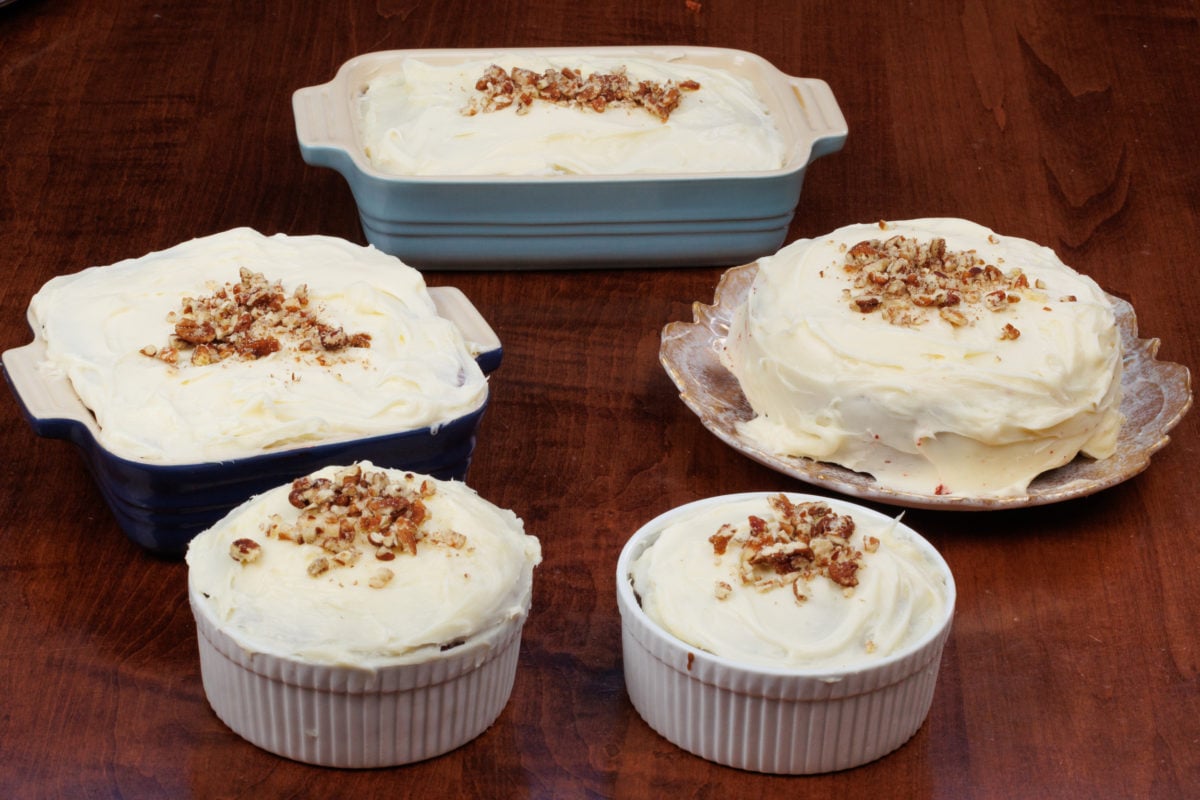
Note: This cake can be baked in a 5×5-inch, 5×7-inch, or 4×6-inch baking dish, a 6-inch round cake pan, or two 10-ounce ramekins. The photos show a 5×5-inch baking dish and a 6-inch round cake pan.
- Preheat the Oven: Set to 350°F (177°C).
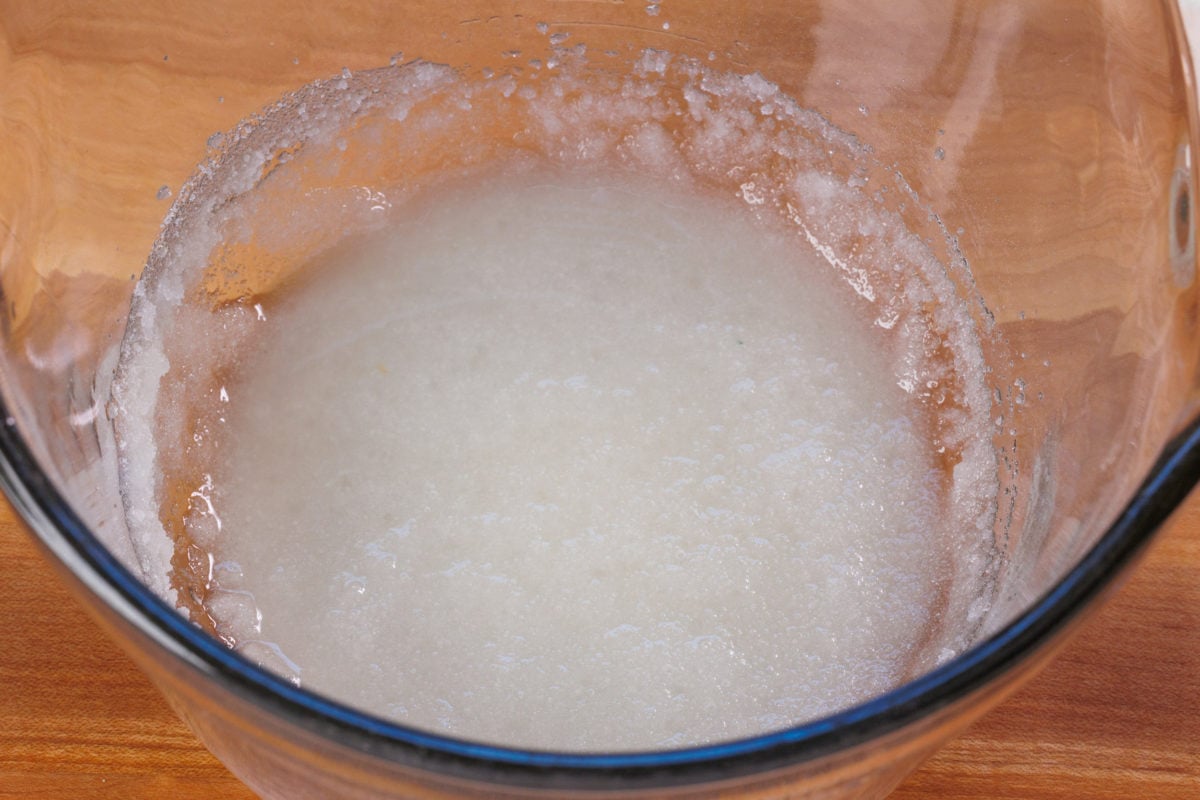
- Mix Wet Ingredients: In a medium bowl, use an electric mixer on medium speed to beat the oil and sugar for 1 minute.
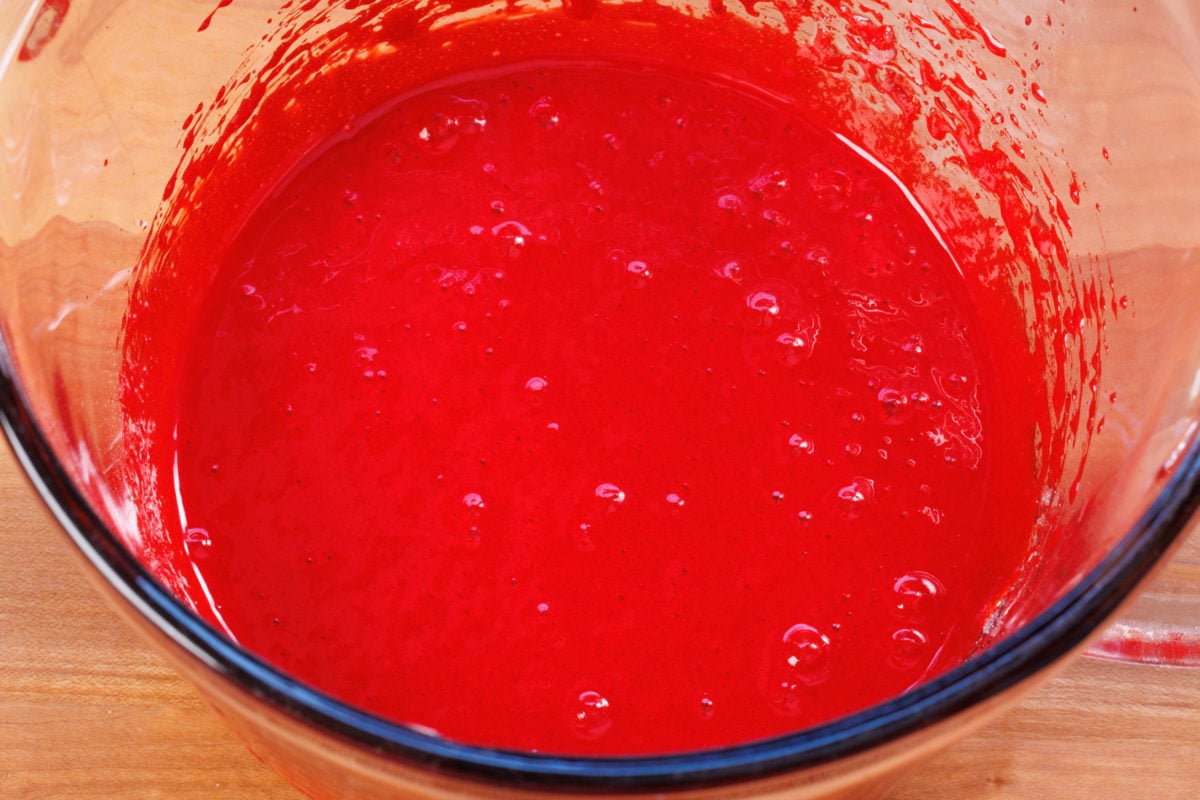
- Add Flavor & Color: Mix in the egg, vanilla, red food coloring, and vinegar. Beat for another minute.
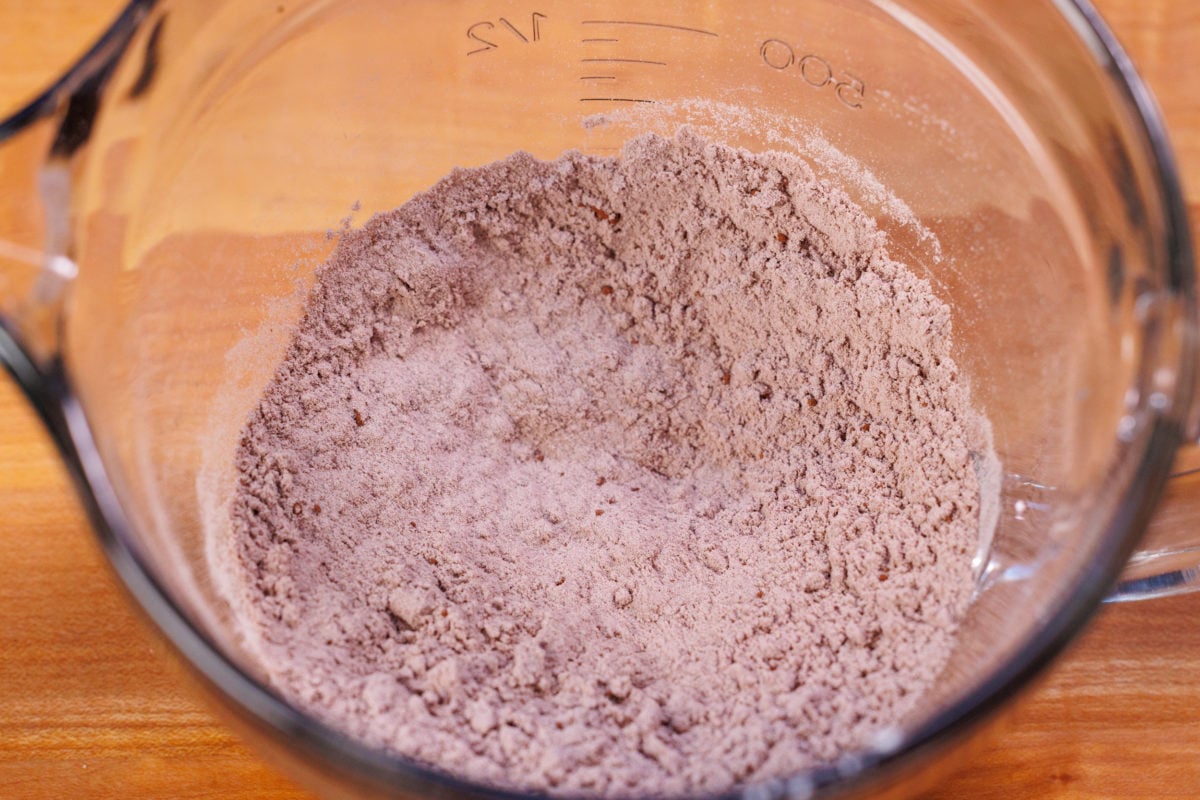
- Combine Dry Ingredients: In a small bowl, whisk together the cocoa powder, flour, baking soda, and salt.
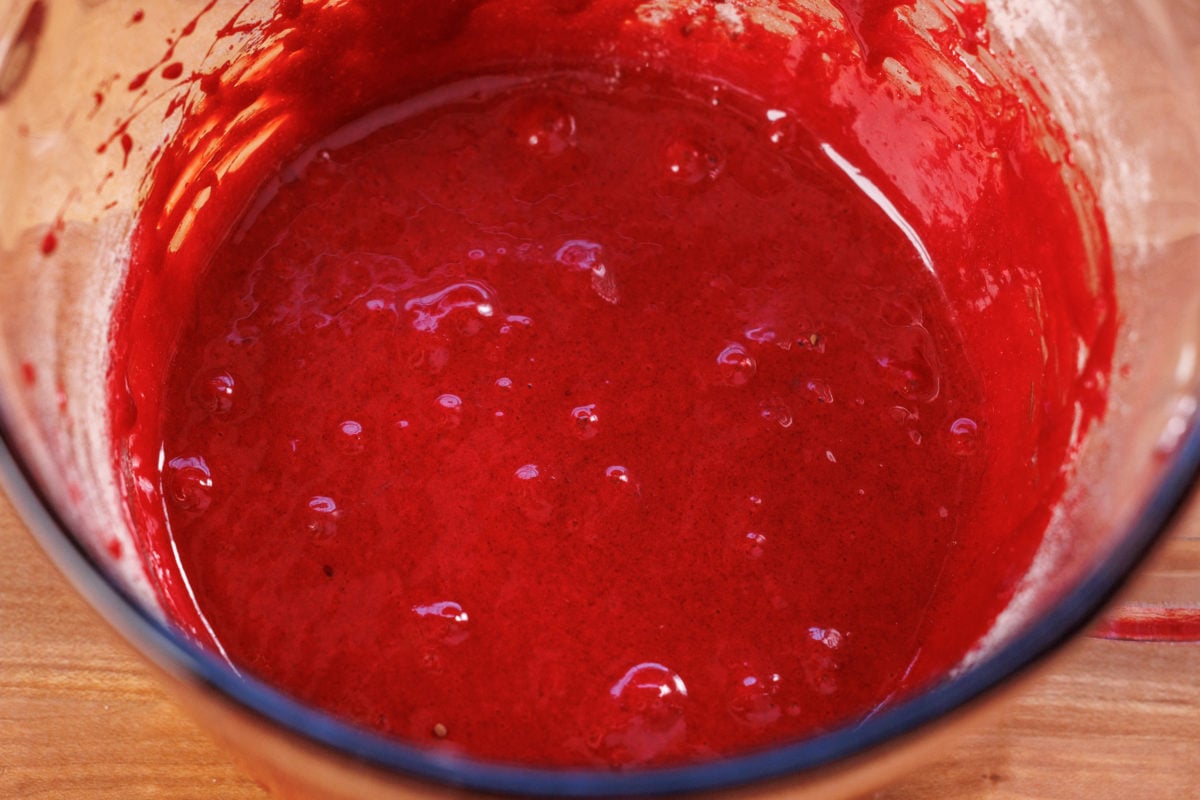
- Mix the Batter: Gradually add half of the dry ingredients to the wet mixture, mixing well. Stir in the buttermilk, then add the remaining dry ingredients, mixing until just combined.
- Prepare the Baking Dish: Lightly grease a small baking dish or cake pan. Pour in the batter.
- Bake: Bake for 35-40 minutes. Let cool completely before frosting.
- Make the Frosting: In a medium bowl, beat softened cream cheese and butter on high speed until smooth. Gradually mix in sifted powdered sugar at low speed. Once combined, add vanilla and beat until fluffy.
- Frost the Cake: Once cooled, spread frosting evenly. Store the cake in the refrigerator.
Best Baking Dish Sizes & Baking Times
This mini red velvet cake can be baked in different dish sizes. Choose one that works best for you:
- 5×5-inch baking dish (25 sq. inches)
- 5×7-inch baking dish (35 sq. inches)
- 4×6-inch baking dish (24 sq. inches)
- 6-inch round cake pan (28 sq. inches)
- Two 10-ounce ramekins (each 12.5 sq. inches)
Baking Times:
- Square & rectangular dishes: 35-40 minutes
- Round pan & ramekins: 30-35 minutes
Tip: If using a 6-inch round cake pan, double the frosting recipe for full coverage. Using a dish significantly larger or smaller than recommended will change the baking time and could affect the texture.
Expert Tips
- Room Temperature Egg: Let the egg sit at room temperature for about 30 minutes before baking. This helps it blend smoothly into the batter.
- Softened Cream Cheese & Butter: For a smooth, easy-to-mix frosting, make sure both are at room temperature.
- Measuring Flour Correctly: For accuracy, use a digital scale. If measuring by hand, fluff the flour first, then spoon it into a dry measuring cup and level it off.
- Baking Time & Doneness: Bake for about 35 minutes. Check by inserting a toothpick in the center, if it comes out clean, it’s done. If needed, bake for 5 more minutes.
Frequently Asked Questions
Yes! The red color is just for appearance, so you can leave it out. The cake will still have the same great flavor.
Absolutely! While cream cheese frosting is traditional, you can use buttercream, whipped cream, or even a simple dusting of powdered sugar.
Since this cake has cream cheese frosting, store it in an airtight container in the refrigerator for up to 4 days.
Yes! Wrap the unfrosted cake tightly in plastic wrap and freeze for up to 2 months. Thaw at room temperature before frosting and serving.
To make a blue velvet cake, simply swap the red food coloring for blue food coloring. For a deeper blue, add a drop of violet food coloring to prevent a greenish tint. Everything else in the recipe stays the same, and you’ll get the same soft, velvety texture with a fun pop of color under the frosting—perfect for birthdays, baby showers, or gender reveals!
Ways To Use Leftover Ingredients
If you have any ingredients leftover from this recipe, check out our Leftover Ingredients Recipe Finder or you might like to consider using them in any of these single serving and small batch recipes:
If you’ve tried this mini red velvet cake or any recipe on One Dish Kitchen please let me know how you liked it by rating the recipe and telling me about it in the comment section below.
Also, if you take a picture please tag us on Instagram (@onedishkitchen) we’d love to see it!
Mini Red Velvet Cake
Watch How To Make This
Equipment
- 5-inch baking dish or a 5×7-inch, a 4×6-inch baking dish, a 6-inch round cake pan, or 2 (10-ounce) ramekins.
Ingredients
For the Cake
- ¼ cup vegetable oil , avocado oil, or canola oil
- ½ cup granulated sugar
- 1 large egg
- ½ teaspoon vanilla extract
- 2 teaspoons red food coloring
- ½ teaspoon white vinegar
- 1 tablespoon unsweetened cocoa powder
- ½ cup all purpose flour
- ¼ teaspoon baking soda
- ⅛ teaspoon salt
- ¼ cup buttermilk
For the Frosting
- 2 ounces cream cheese -softened to room temperature
- 2 tablespoons butter -softened to room temperature
- ½ cup powdered sugar -sifted
- ¼ teaspoon vanilla extract
- Optional: 2 tablespoons chopped pecans for garnish
Instructions
- Preheat the Oven: Set to 350°F (177°C).
Make the Cake
- Mix Wet Ingredients: In a medium bowl, use an electric mixer on medium speed to beat the oil and sugar for 1 minute.
- Add Flavor & Color: Mix in the egg, vanilla, red food coloring, and vinegar. Beat for another minute.
- Combine Dry Ingredients: In a small bowl, whisk together the cocoa powder, flour, baking soda, and salt.
- Mix the Batter: Gradually add half of the dry ingredients to the wet mixture, mixing well. Stir in the buttermilk, then add the remaining dry ingredients, mixing until just combined.
- Prepare the Baking Dish: Lightly grease a small baking dish or cake pan. Pour in the batter. Place the baking dish on a rimmed baking sheet to catch any spills.
- Bake: Bake for 35-40 minutes. Let cool completely before frosting.
Make The Frosting
- In a medium bowl, beat softened cream cheese and butter on high speed until smooth. Gradually mix in sifted powdered sugar at low speed. Once combined, add vanilla and beat until fluffy.
- Frost the Cake: Once cooled, spread frosting evenly. Store the cake in the refrigerator.
Notes
-
- Room Temperature Egg: Let the egg sit at room temperature for about 30 minutes before baking. This helps it blend smoothly into the batter.
-
- Softened Cream Cheese & Butter: For a smooth, easy-to-mix frosting, make sure both are at room temperature.
-
- Measuring Flour Correctly: For accuracy, use a digital scale. If measuring by hand, fluff the flour first, then spoon it into a dry measuring cup and level it off.
-
- Baking Time & Doneness: Bake for about 35 minutes. Check by inserting a toothpick in the center—if it comes out clean, it’s done. If needed, bake for 5 more minutes.
This mini red velvet cake can be baked in different dish sizes. Choose one that works best for you:
- 5×5-inch baking dish (25 sq. inches)
- 5×7-inch baking dish (35 sq. inches)
- 4×6-inch baking dish (24 sq. inches)
- 6-inch round cake pan (28 sq. inches)
- Two 10-ounce ramekins (each 12.5 sq. inches)
- Square & rectangular dishes: 35-40 minutes
- Round pan & ramekins: 30-35 minutes
Nutrition
The information shown is an estimate provided by an online nutrition calculator. It should not be considered a substitute for a professional nutritionist’s advice.


I love your small recipes since we are elderly people, but is it possible that you could add a note to the cake recipes for what to add for high altitude
I’m so glad the small recipes are helpful for you.
I’m not very familiar with baking at high altitudes, so I don’t feel confident giving specific adjustments. Because of that, I recommend checking resources that specialize in high altitude baking for the most reliable guidance.
One of the best guides I’ve found is from King Arthur Baking Company. It’s very thorough and easy to follow:
https://www.kingarthurbaking.com/learn/resources/high-altitude-baking